SSO + Sync with Microsoft Entra ID
Firezone integrates with Microsoft Entra ID using a custom connector that supports both authentication and directory sync. Use this guide if you're looking to setup SSO with Microsoft Entra ID for your Firezone Enterprise account and want to automatically sync users and groups from Microsoft Entra ID to Firezone.
If you're just looking to authenticate users against Microsoft Entra ID without automatic directory sync, use our universal OIDC connector instead, available on all plans.
Overview
The Firezone Microsoft Entra ID connector integrates with Microsoft's identity APIs to support user authentication and directory sync.
Users and groups are synced every few minutes to ensure that your Firezone account remains up-to-date with the latest identity data from Entra ID. Read more about how sync works.
Setup
Setting up the Entra ID connector is similar to the process of setting up a universal OIDC connector. The main difference is the addition of a few extra read-only scopes needed to enable sync.
Follow the steps below to setup the Entra ID connector.
Step 1: Start the Entra ID provider setup in Firezone
In your admin portal, go to Settings -> Identity Providers and click
Add Identity Provider. Then, select Microsoft Entra ID from the list of
identity providers.
You'll be shown a summary of the steps you need to complete to setup the Entra ID provider. Keep this page open as you'll need to refer to it in the following steps.
Step 2: Create a new app registration in Entra ID
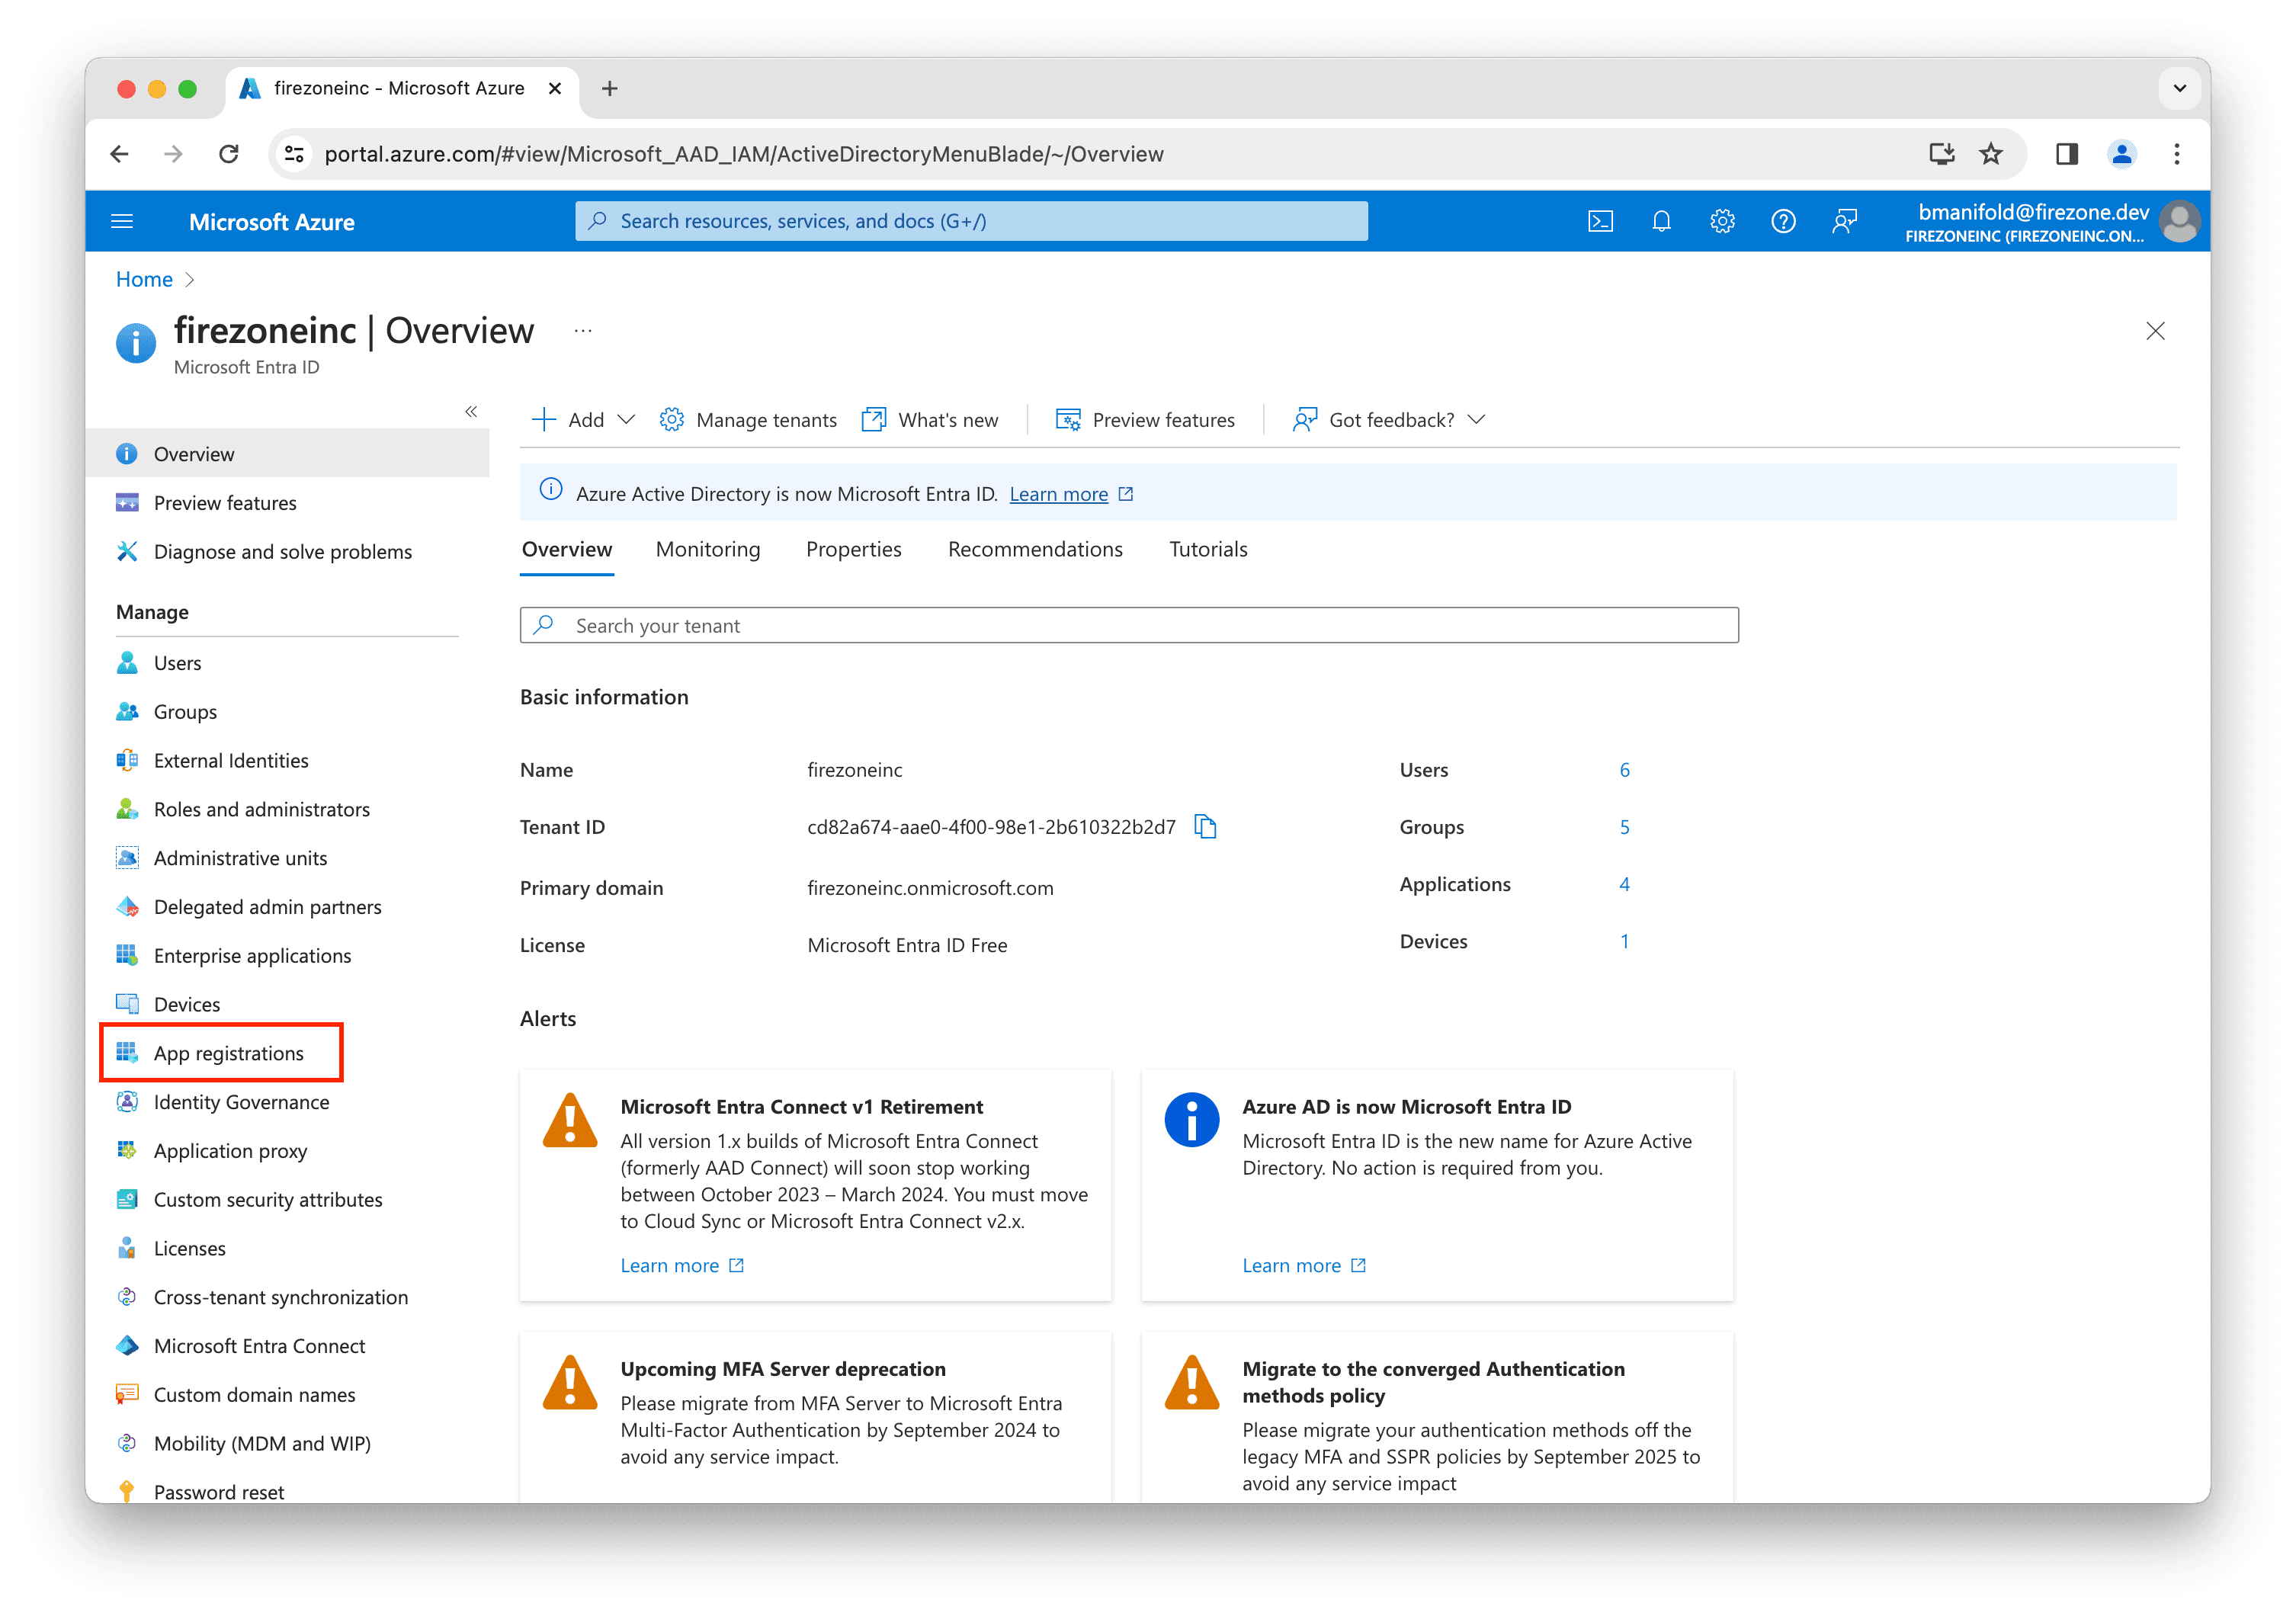
Login to your Azure portal, then click App registrations.
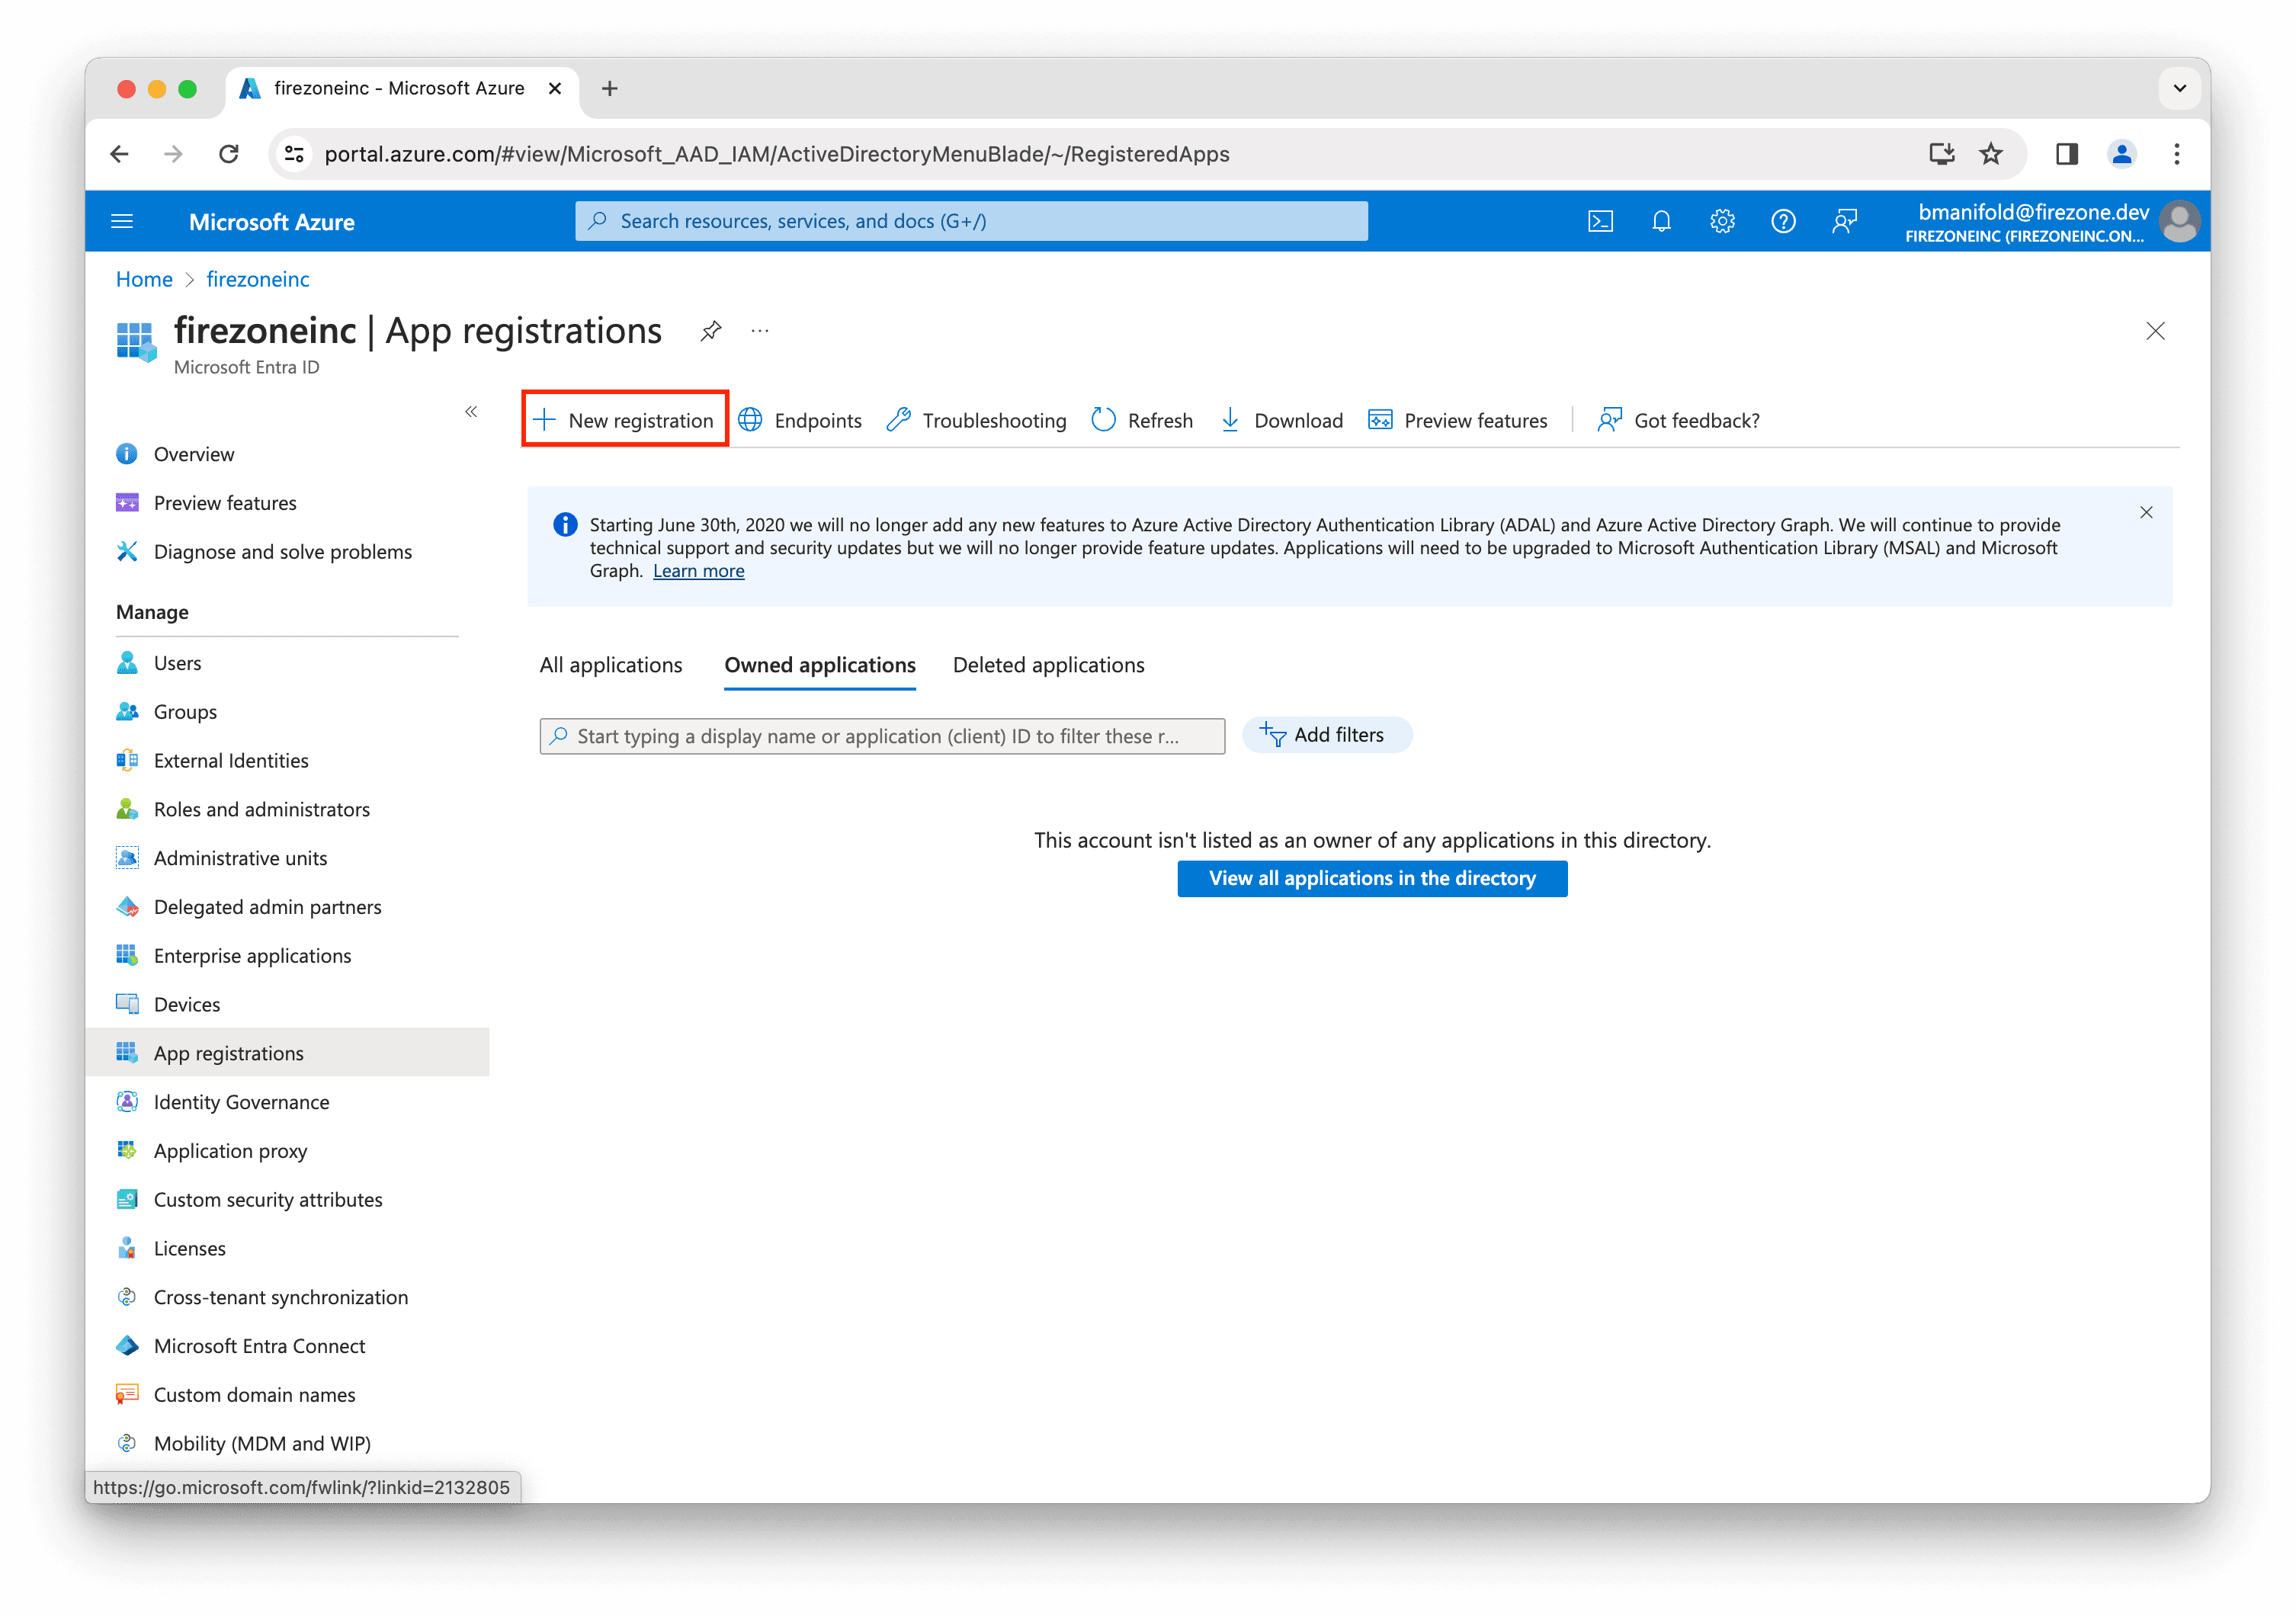
Next, click New registration.
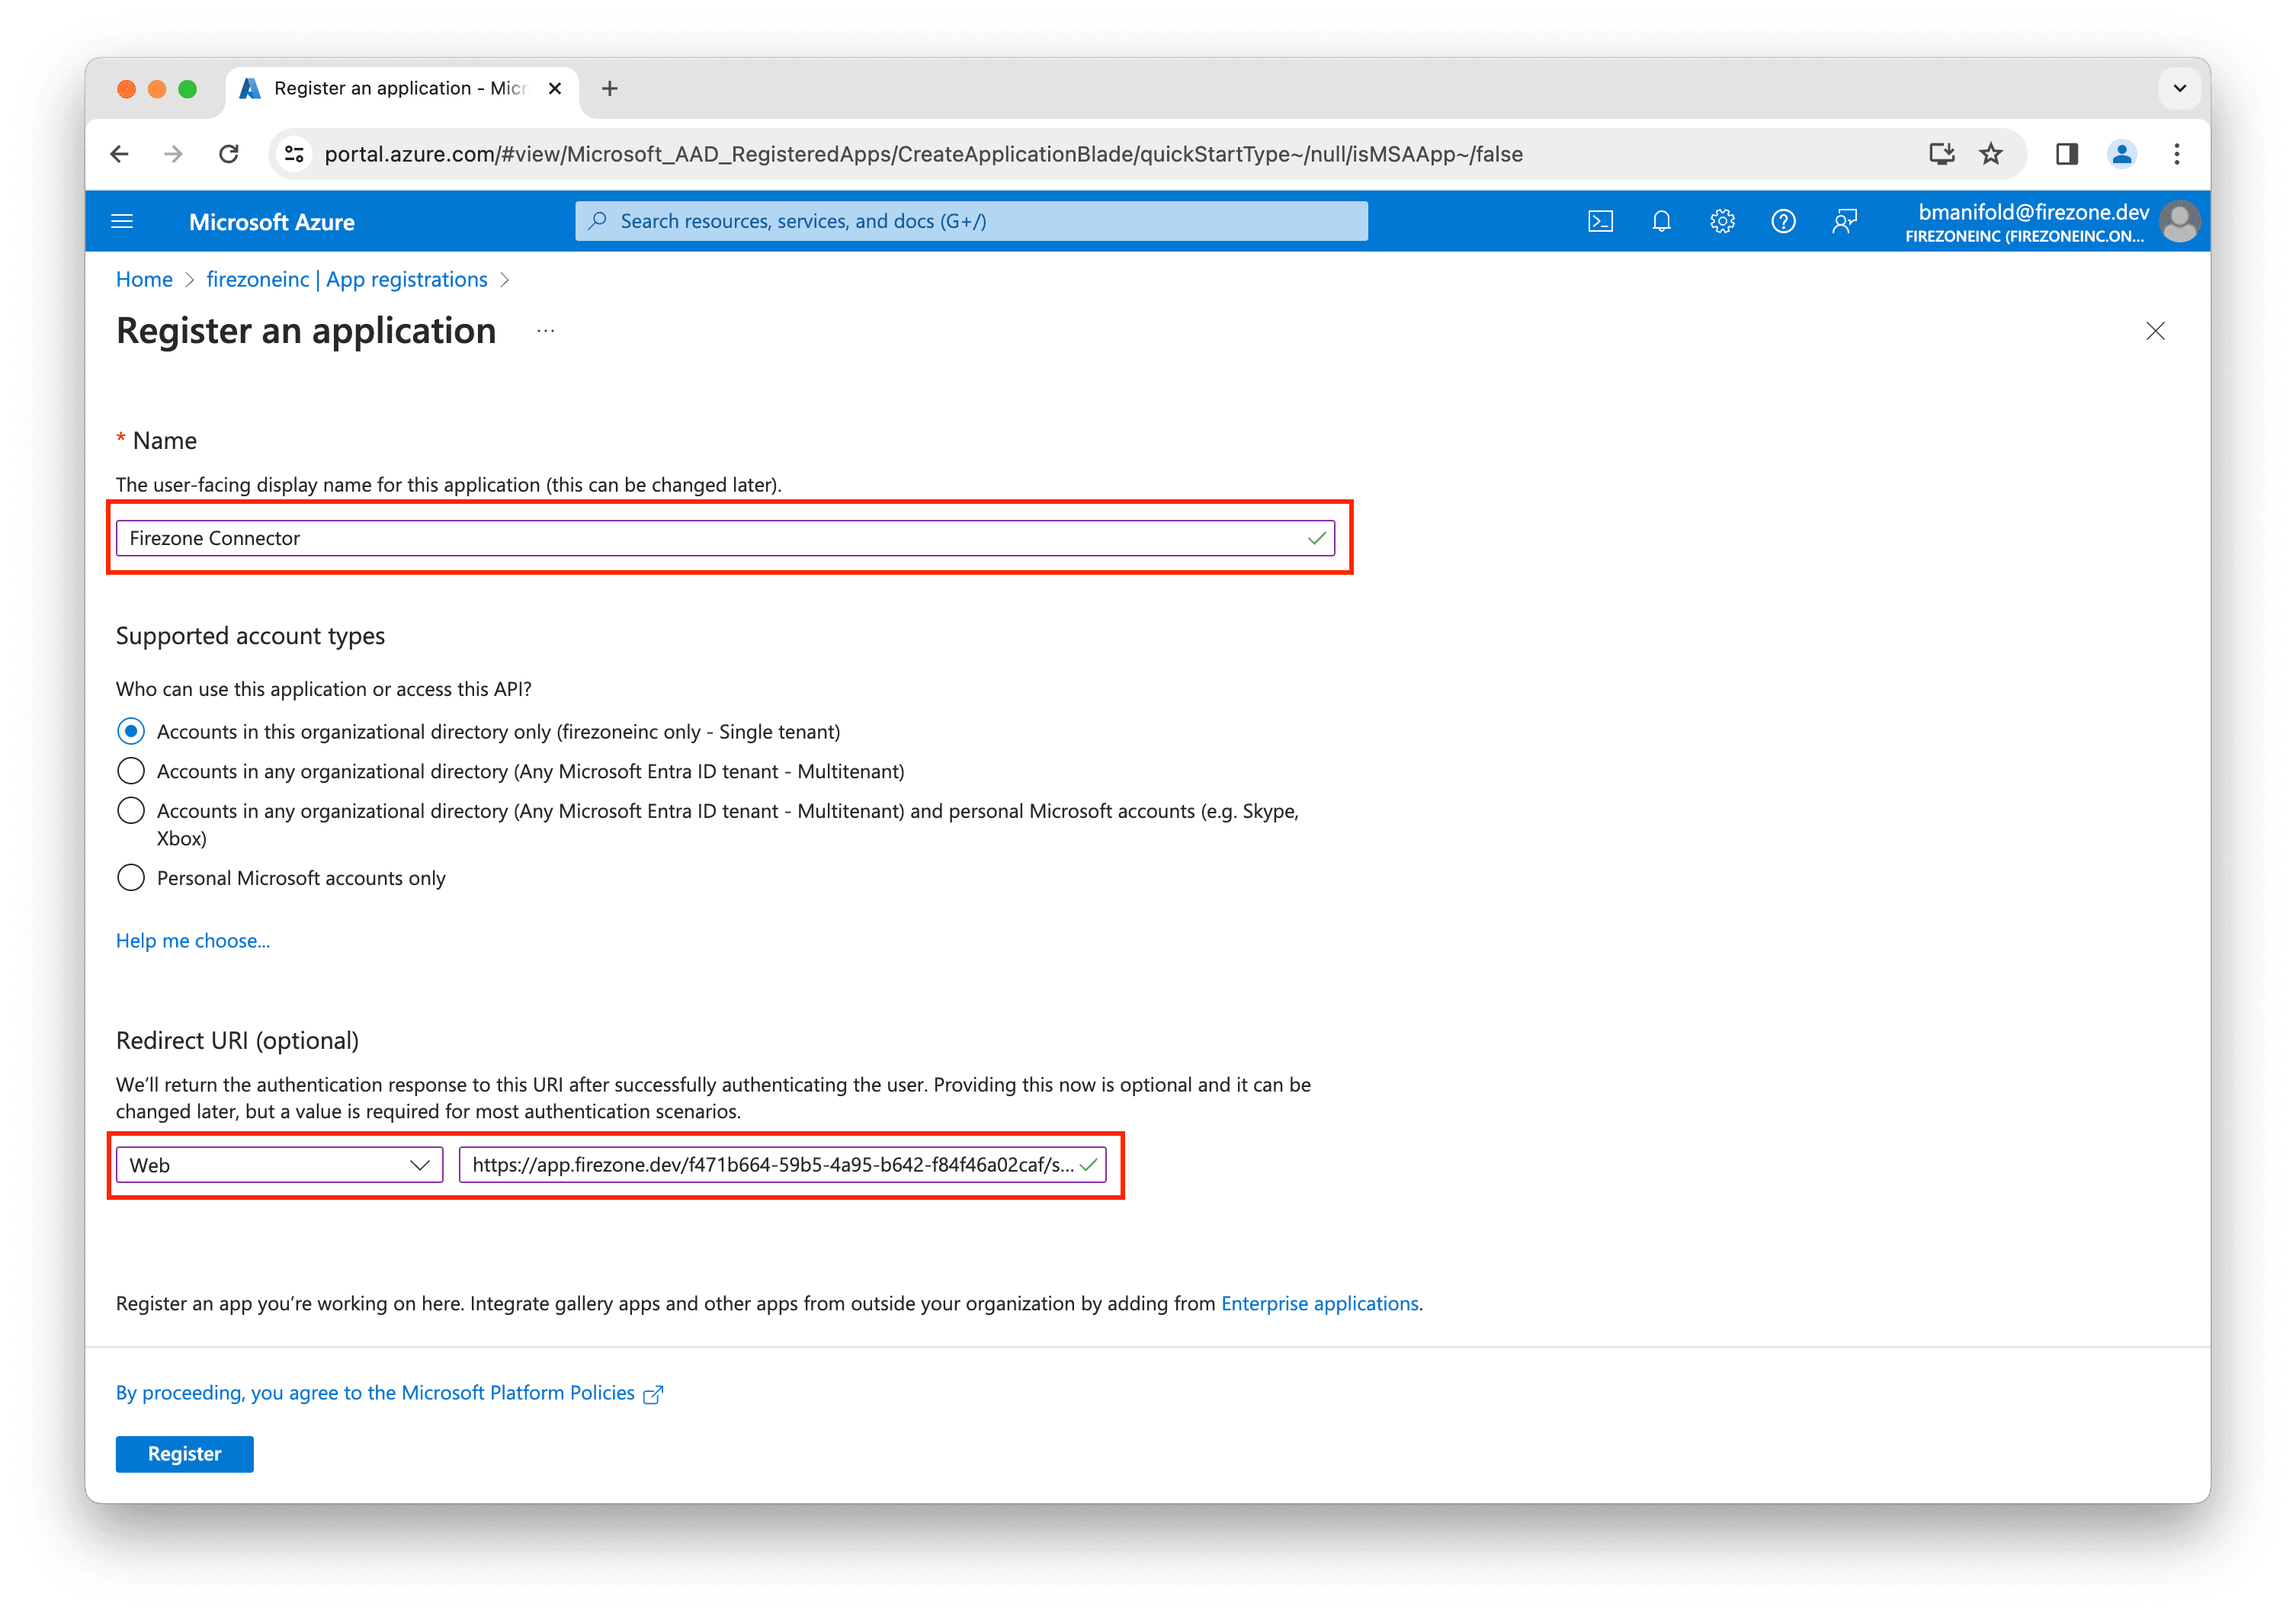
Enter Firezone Connector for the application name.
Select Single tenant for the supported account types.
Copy the first Redirect URI shown in the setup page from the Firezone admin portal and paste it into the Redirect URI field, ensuring Web is selected.
Then, click Register.
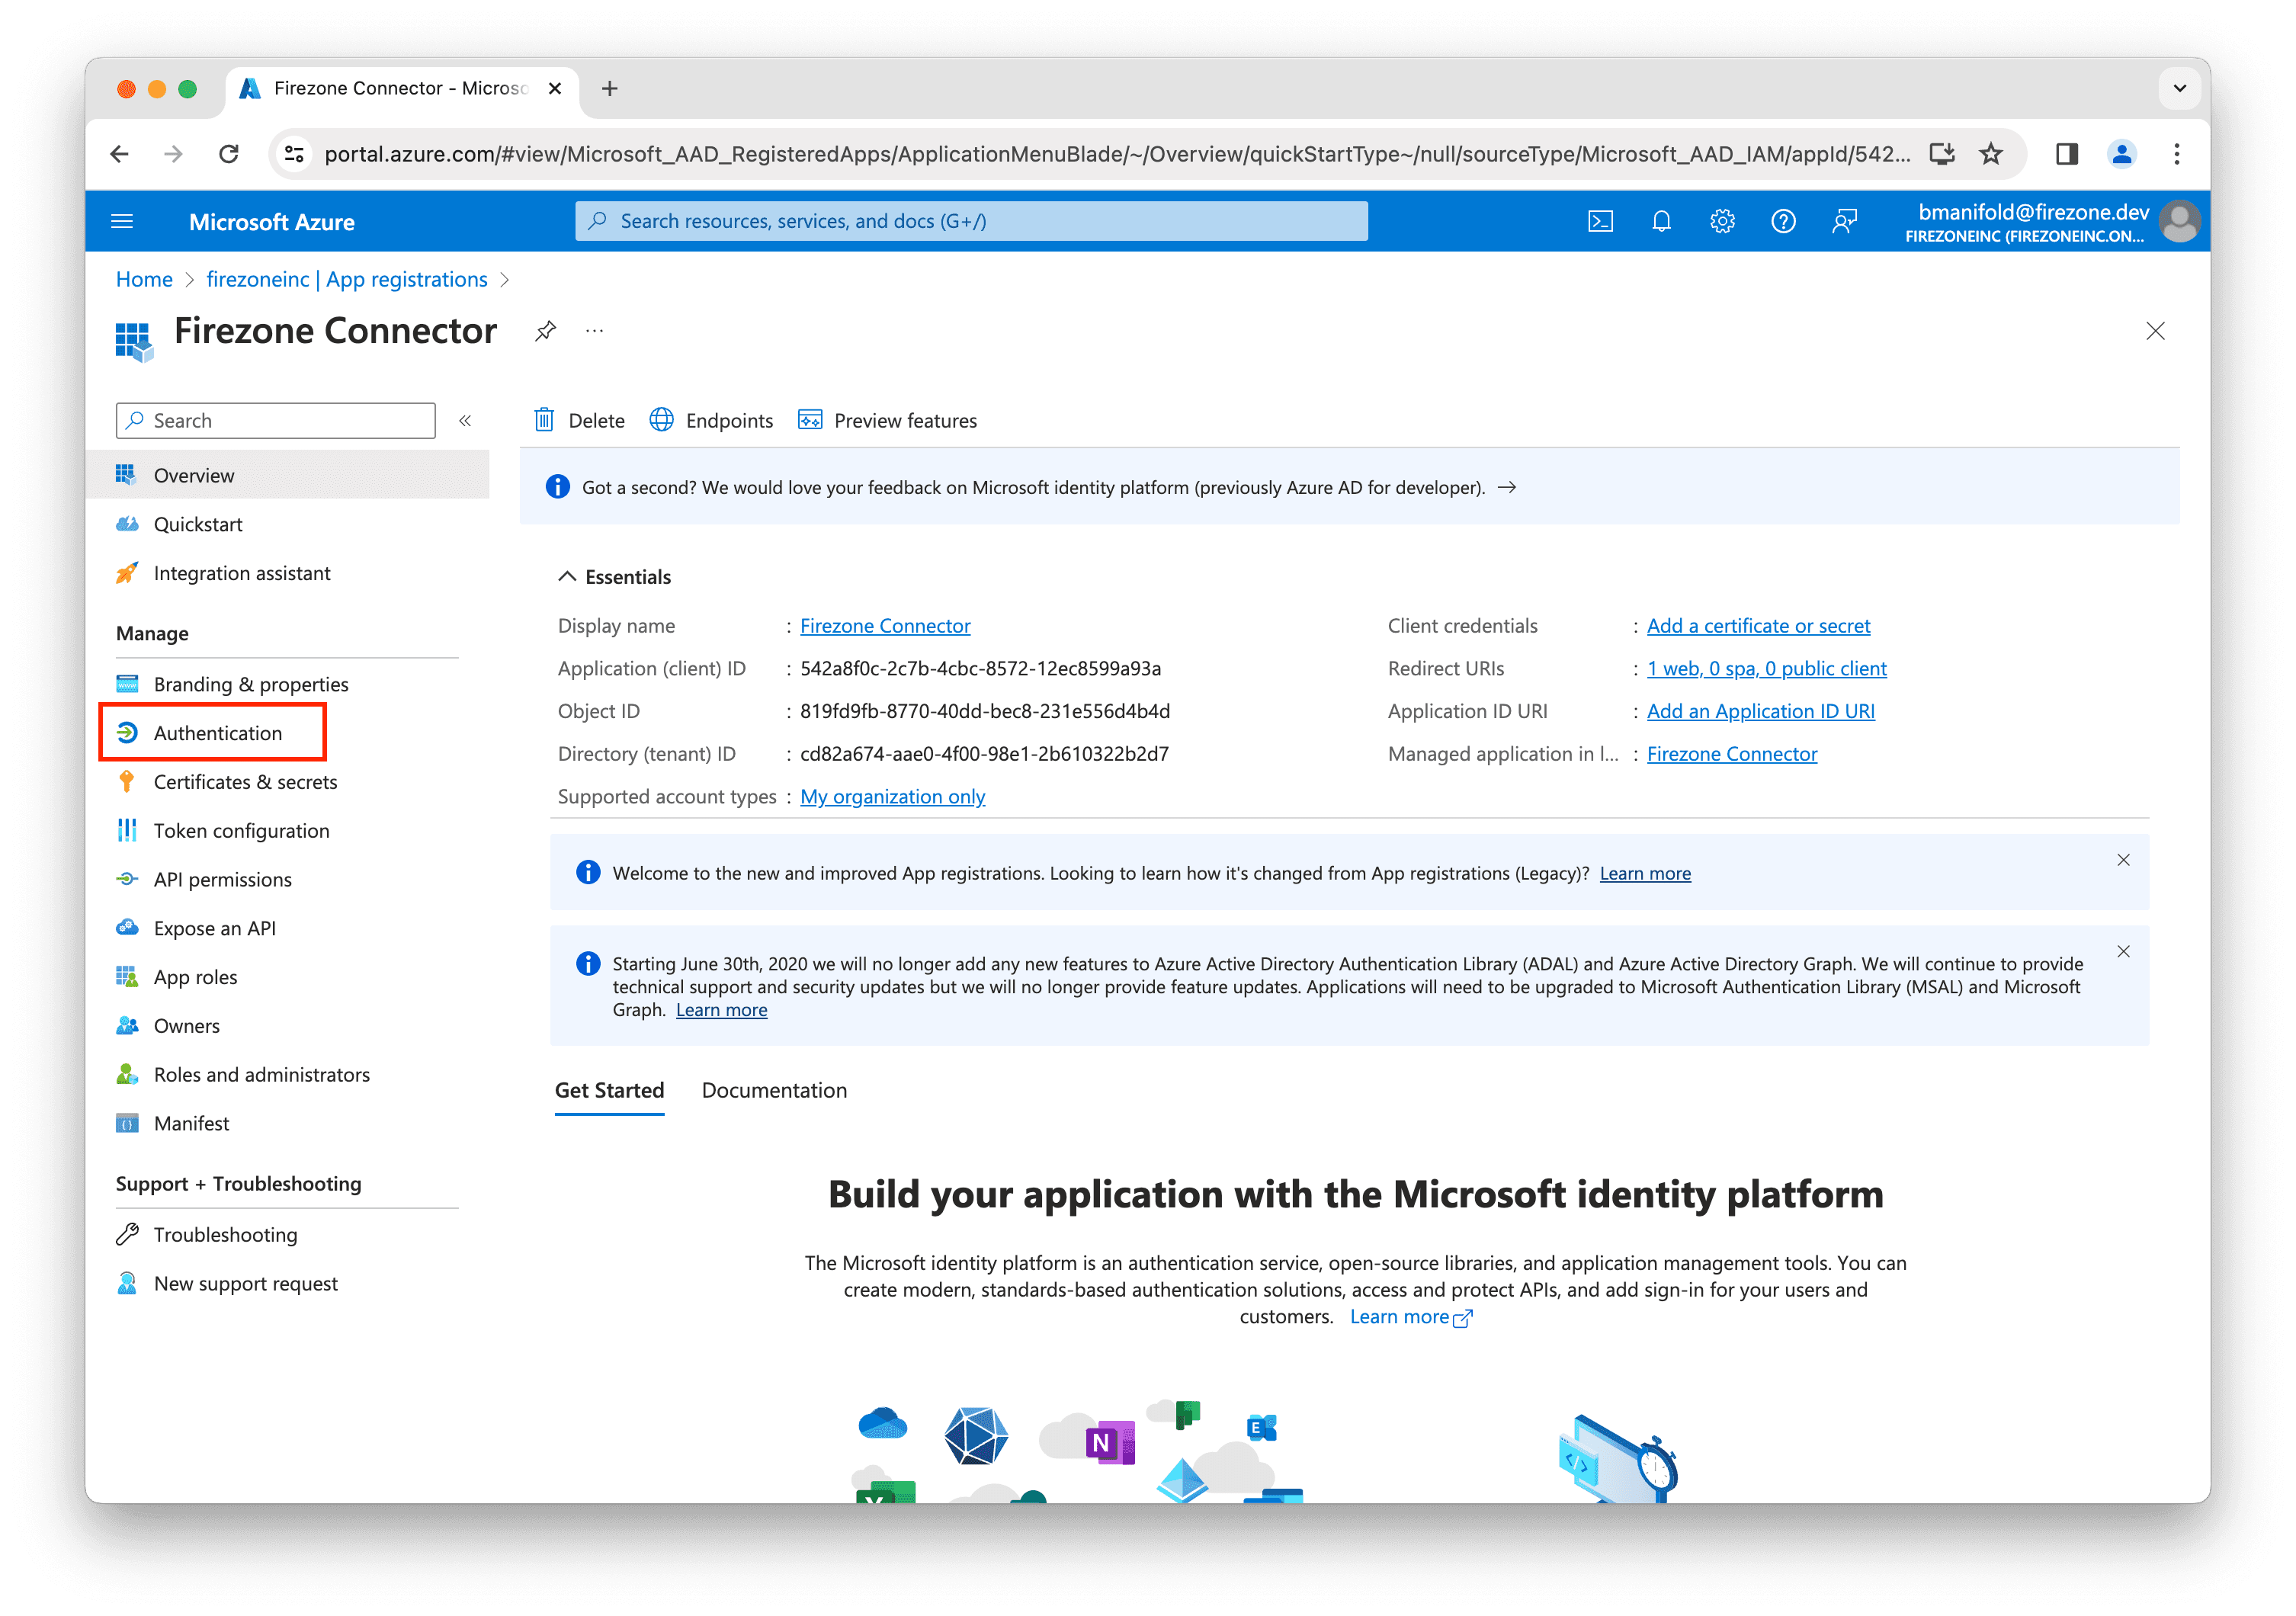
On the next page, click Authentication in the left sidebar.
In the Web section, click Add URI.
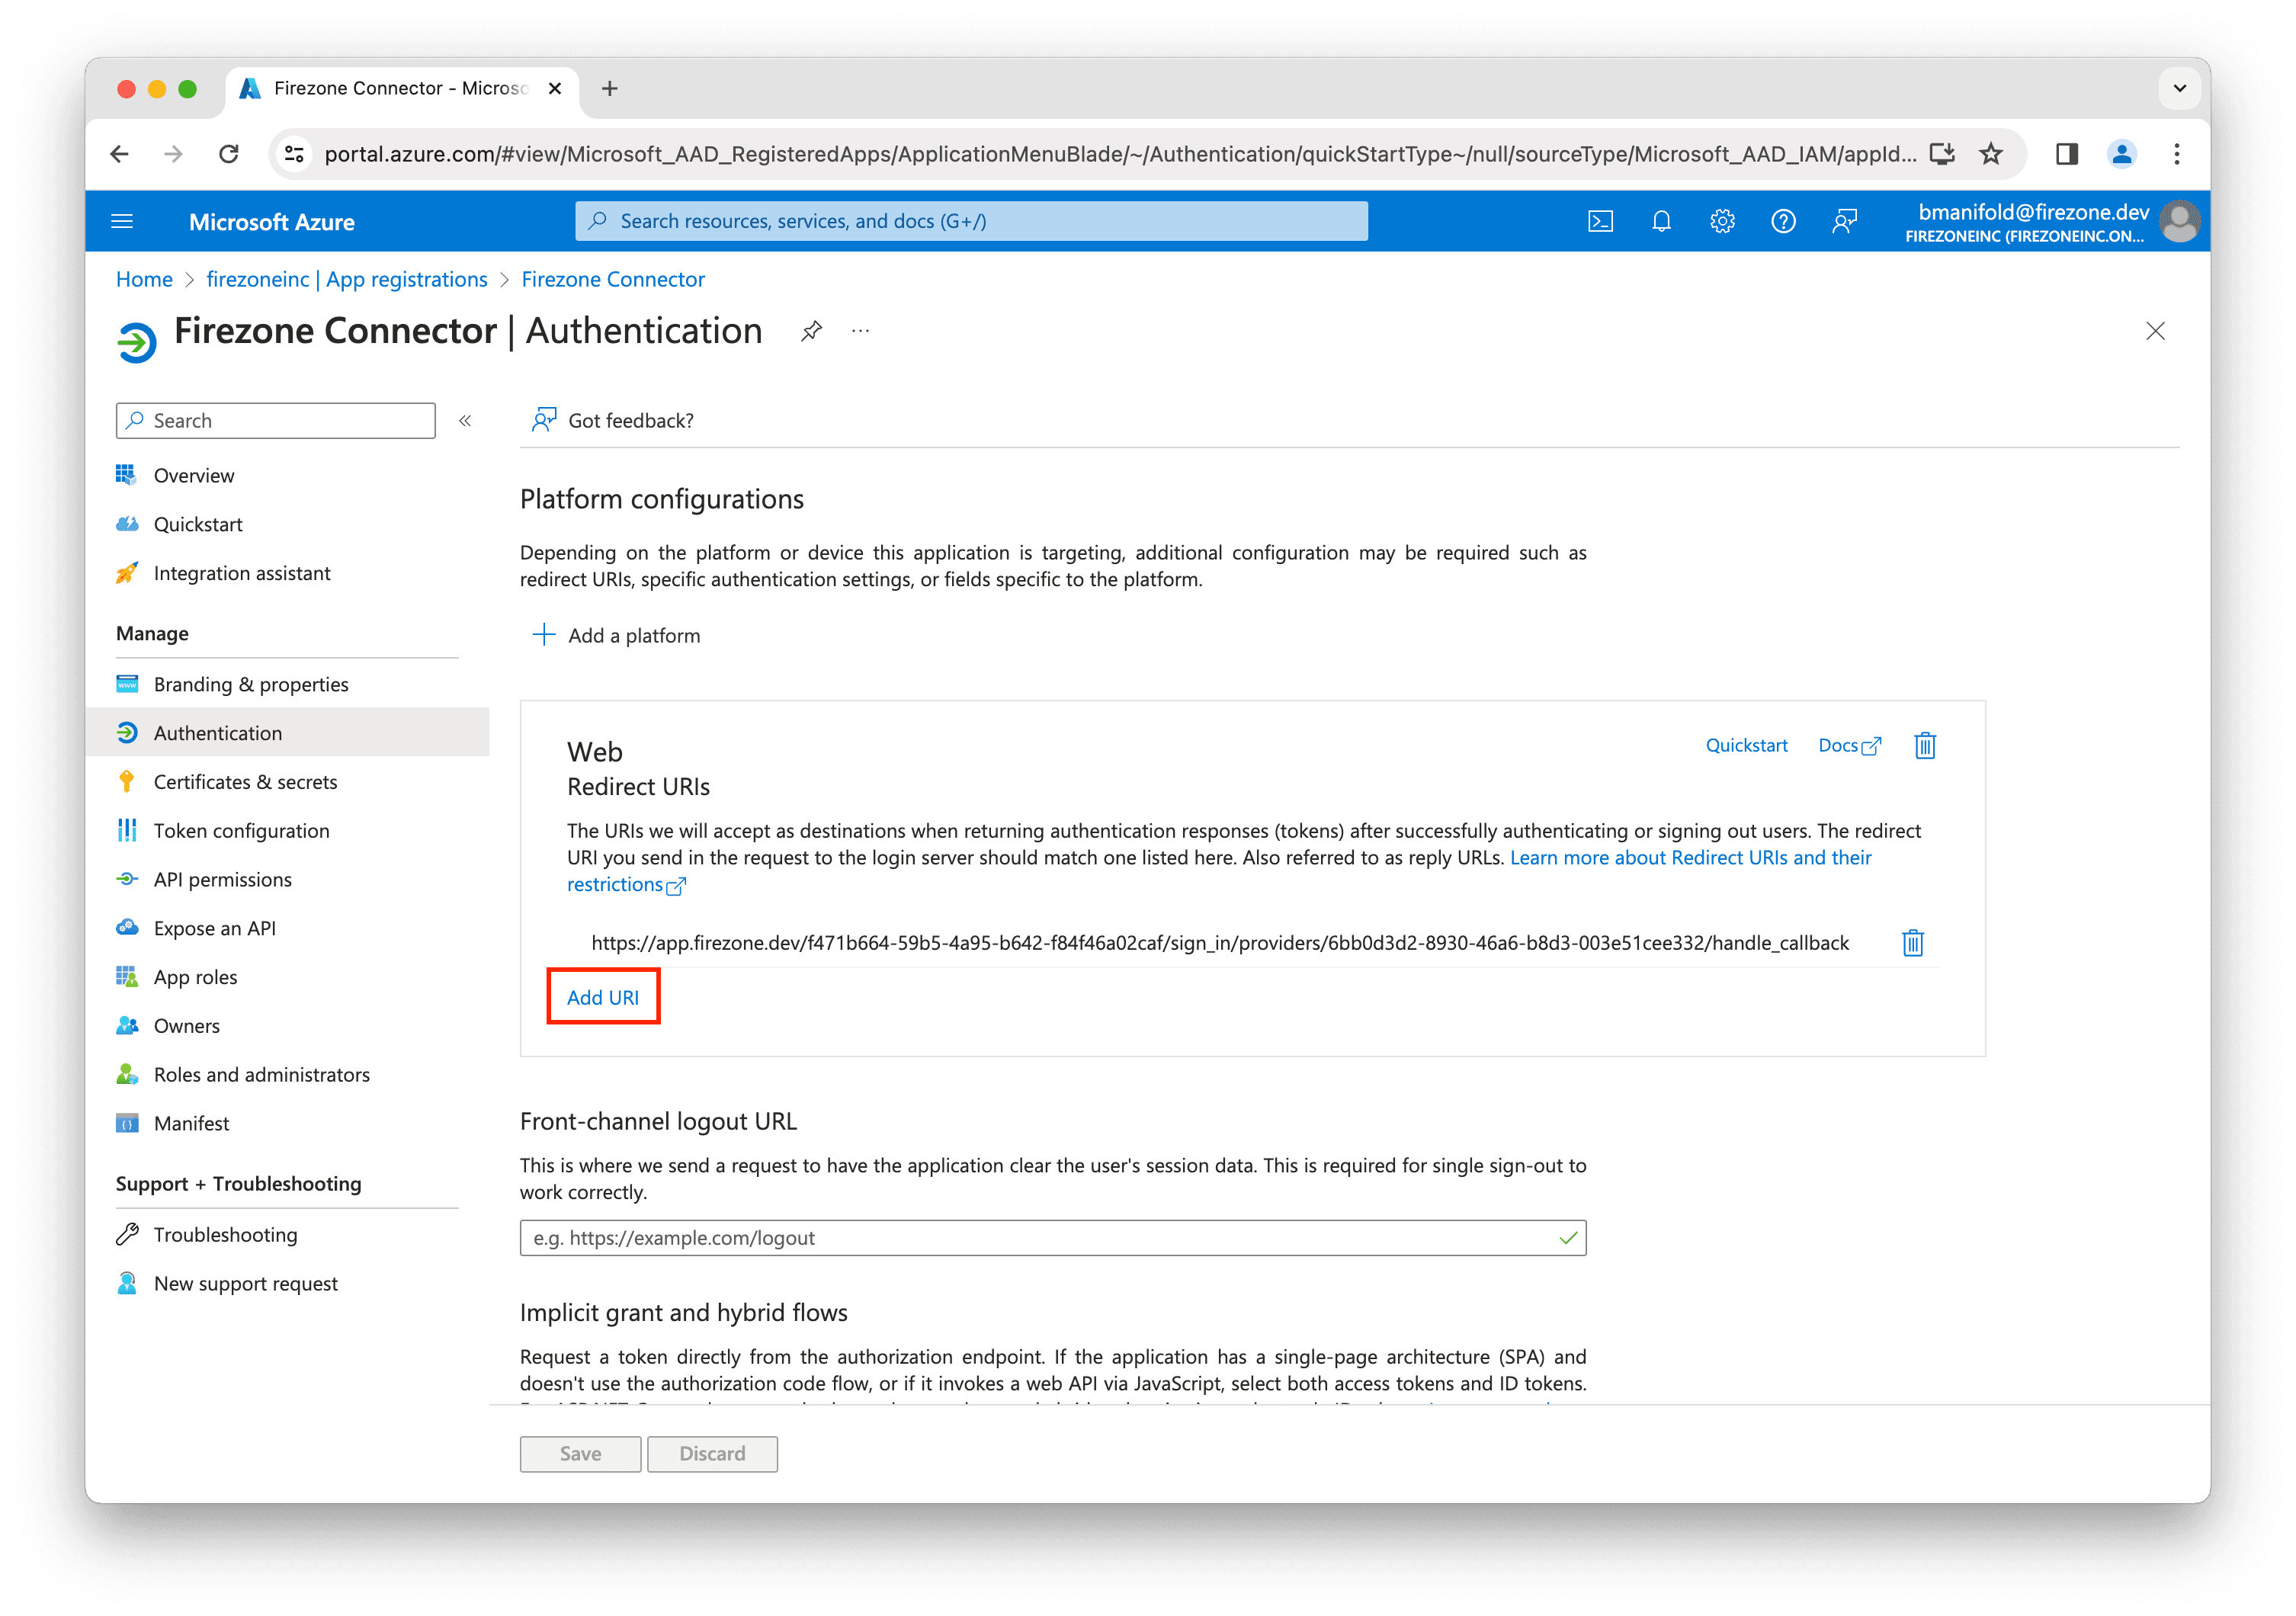
Enter the second Redirect URI shown in the setup page from the Firezone admin portal and click Save.
Important: Ensure both Redirect URI fields are populated correctly.

Step 3: Create client credentials
Now you'll need to add OAuth credentials to allow Firezone to connect to your Entra ID account.
Back on the Firezone Connector app registration page, click Certificates & secrets in the left sidebar.
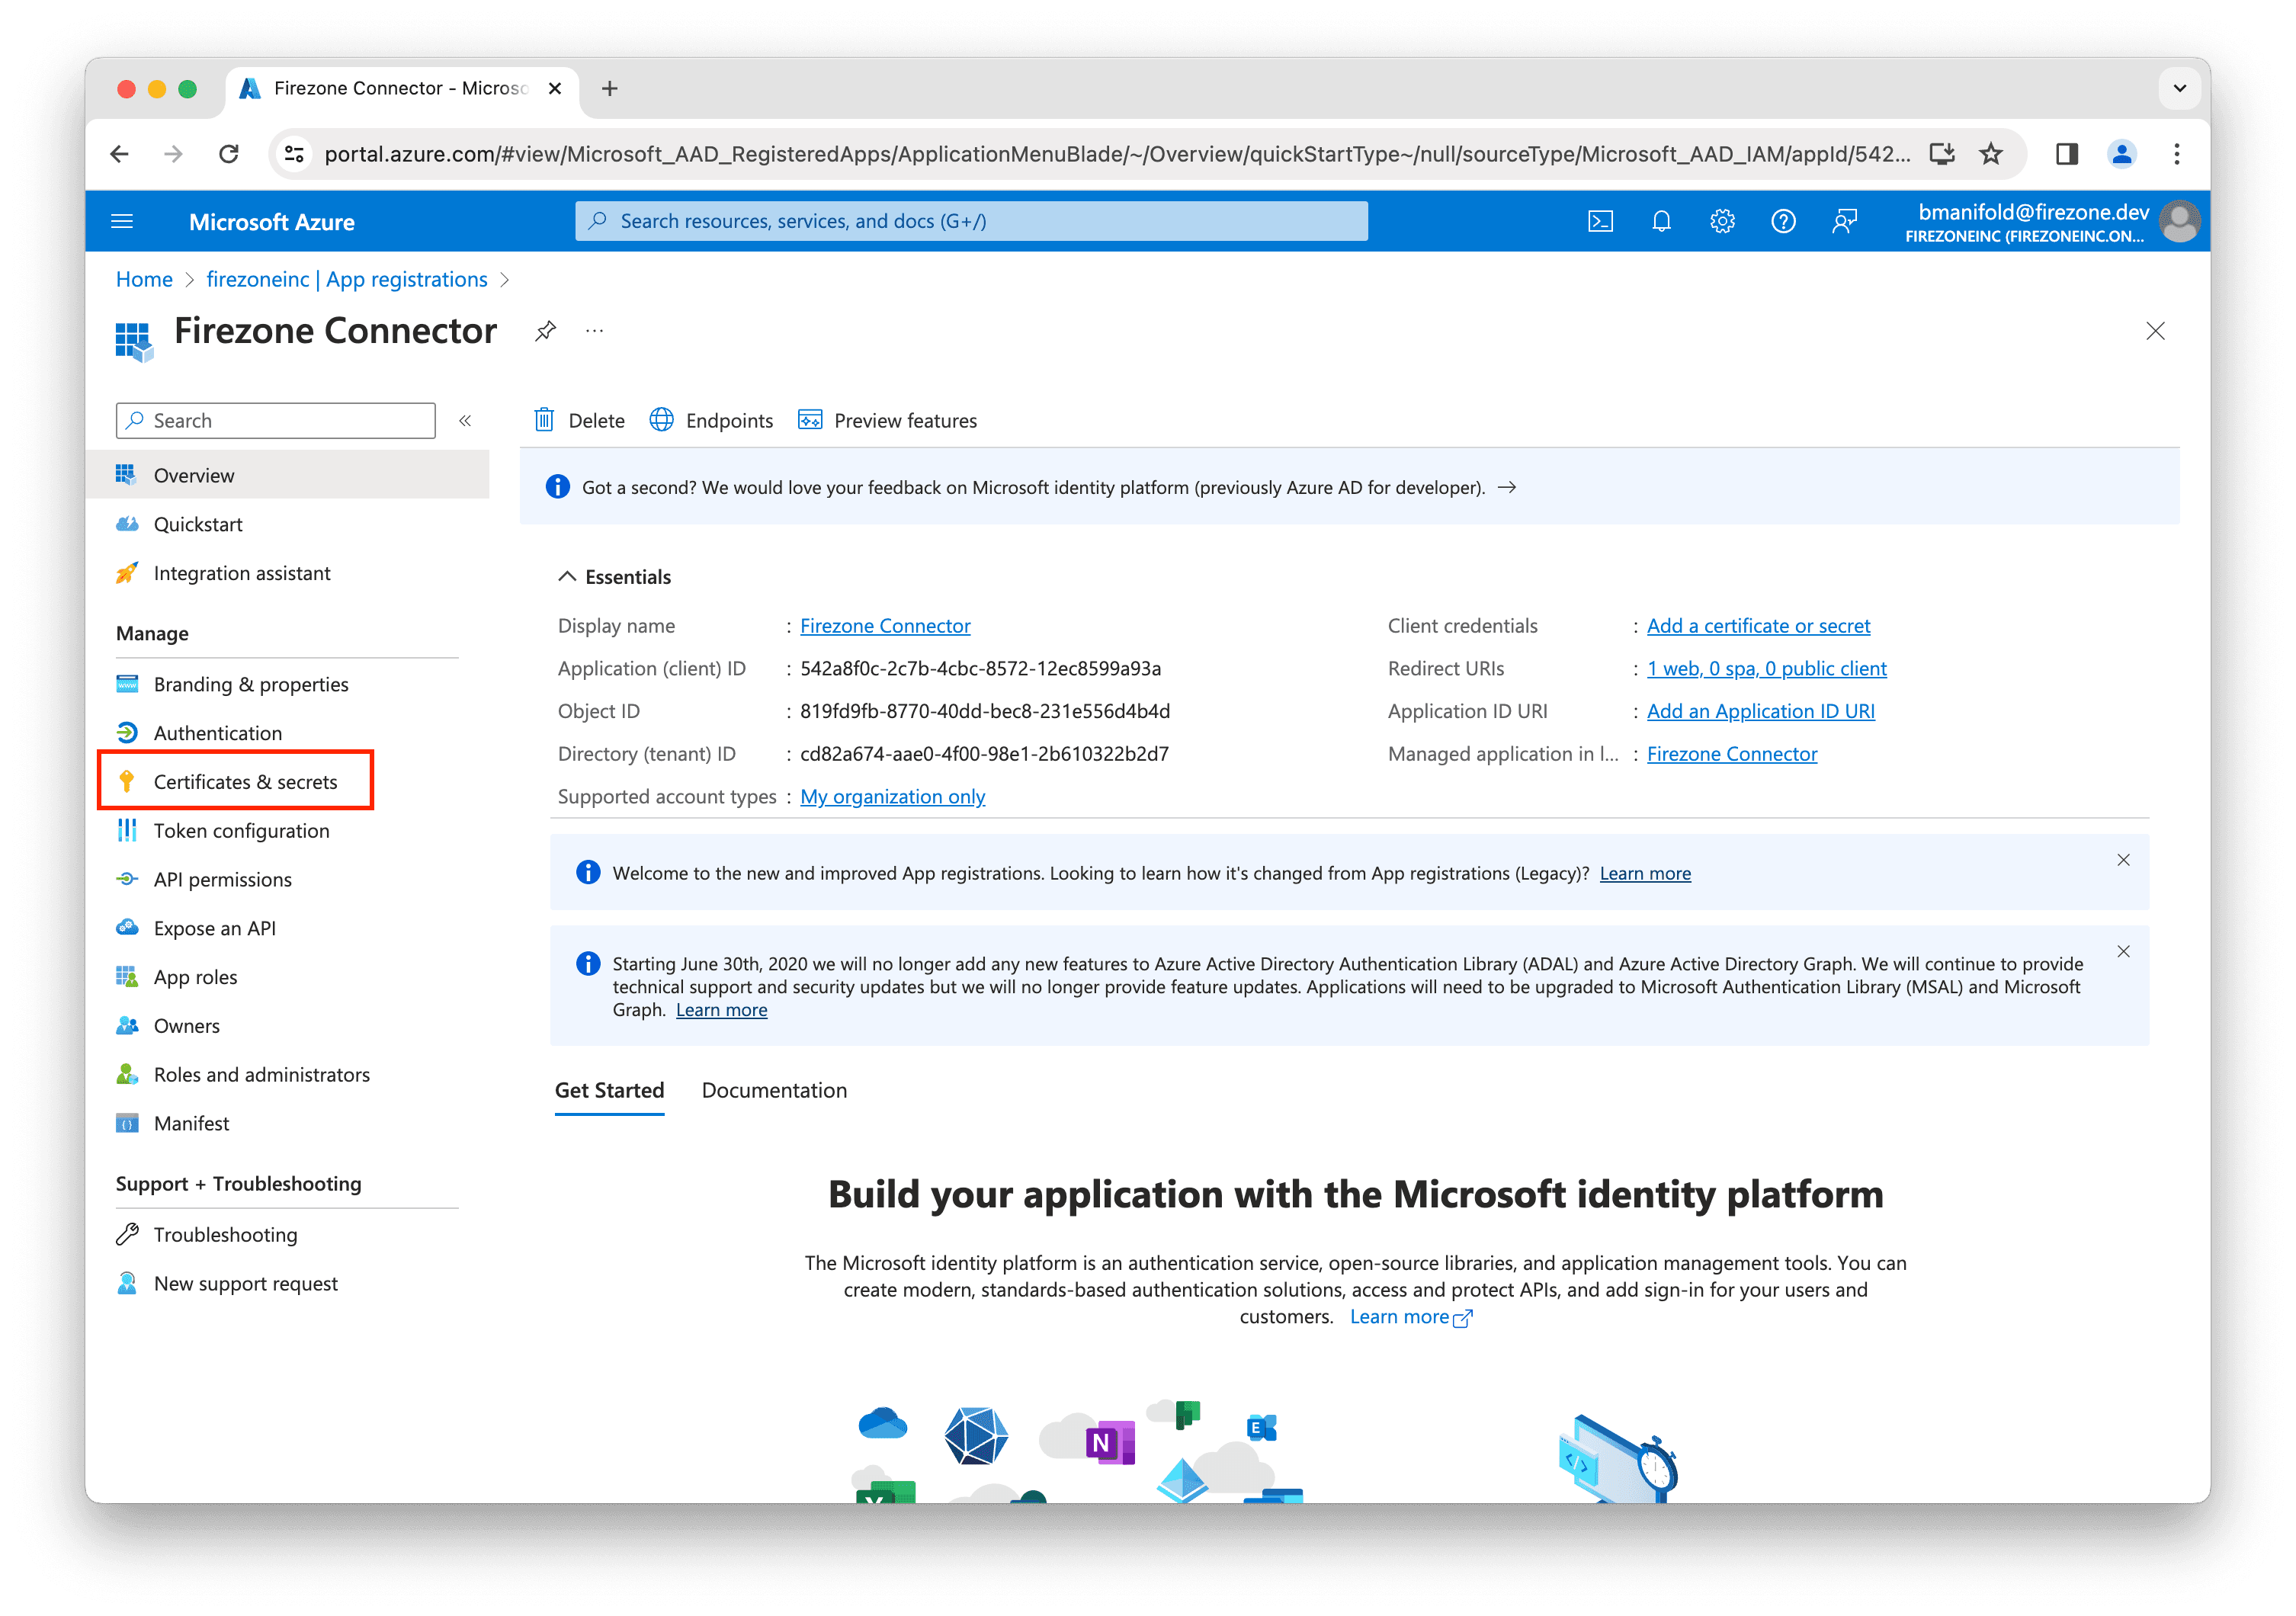
Click New client secret.
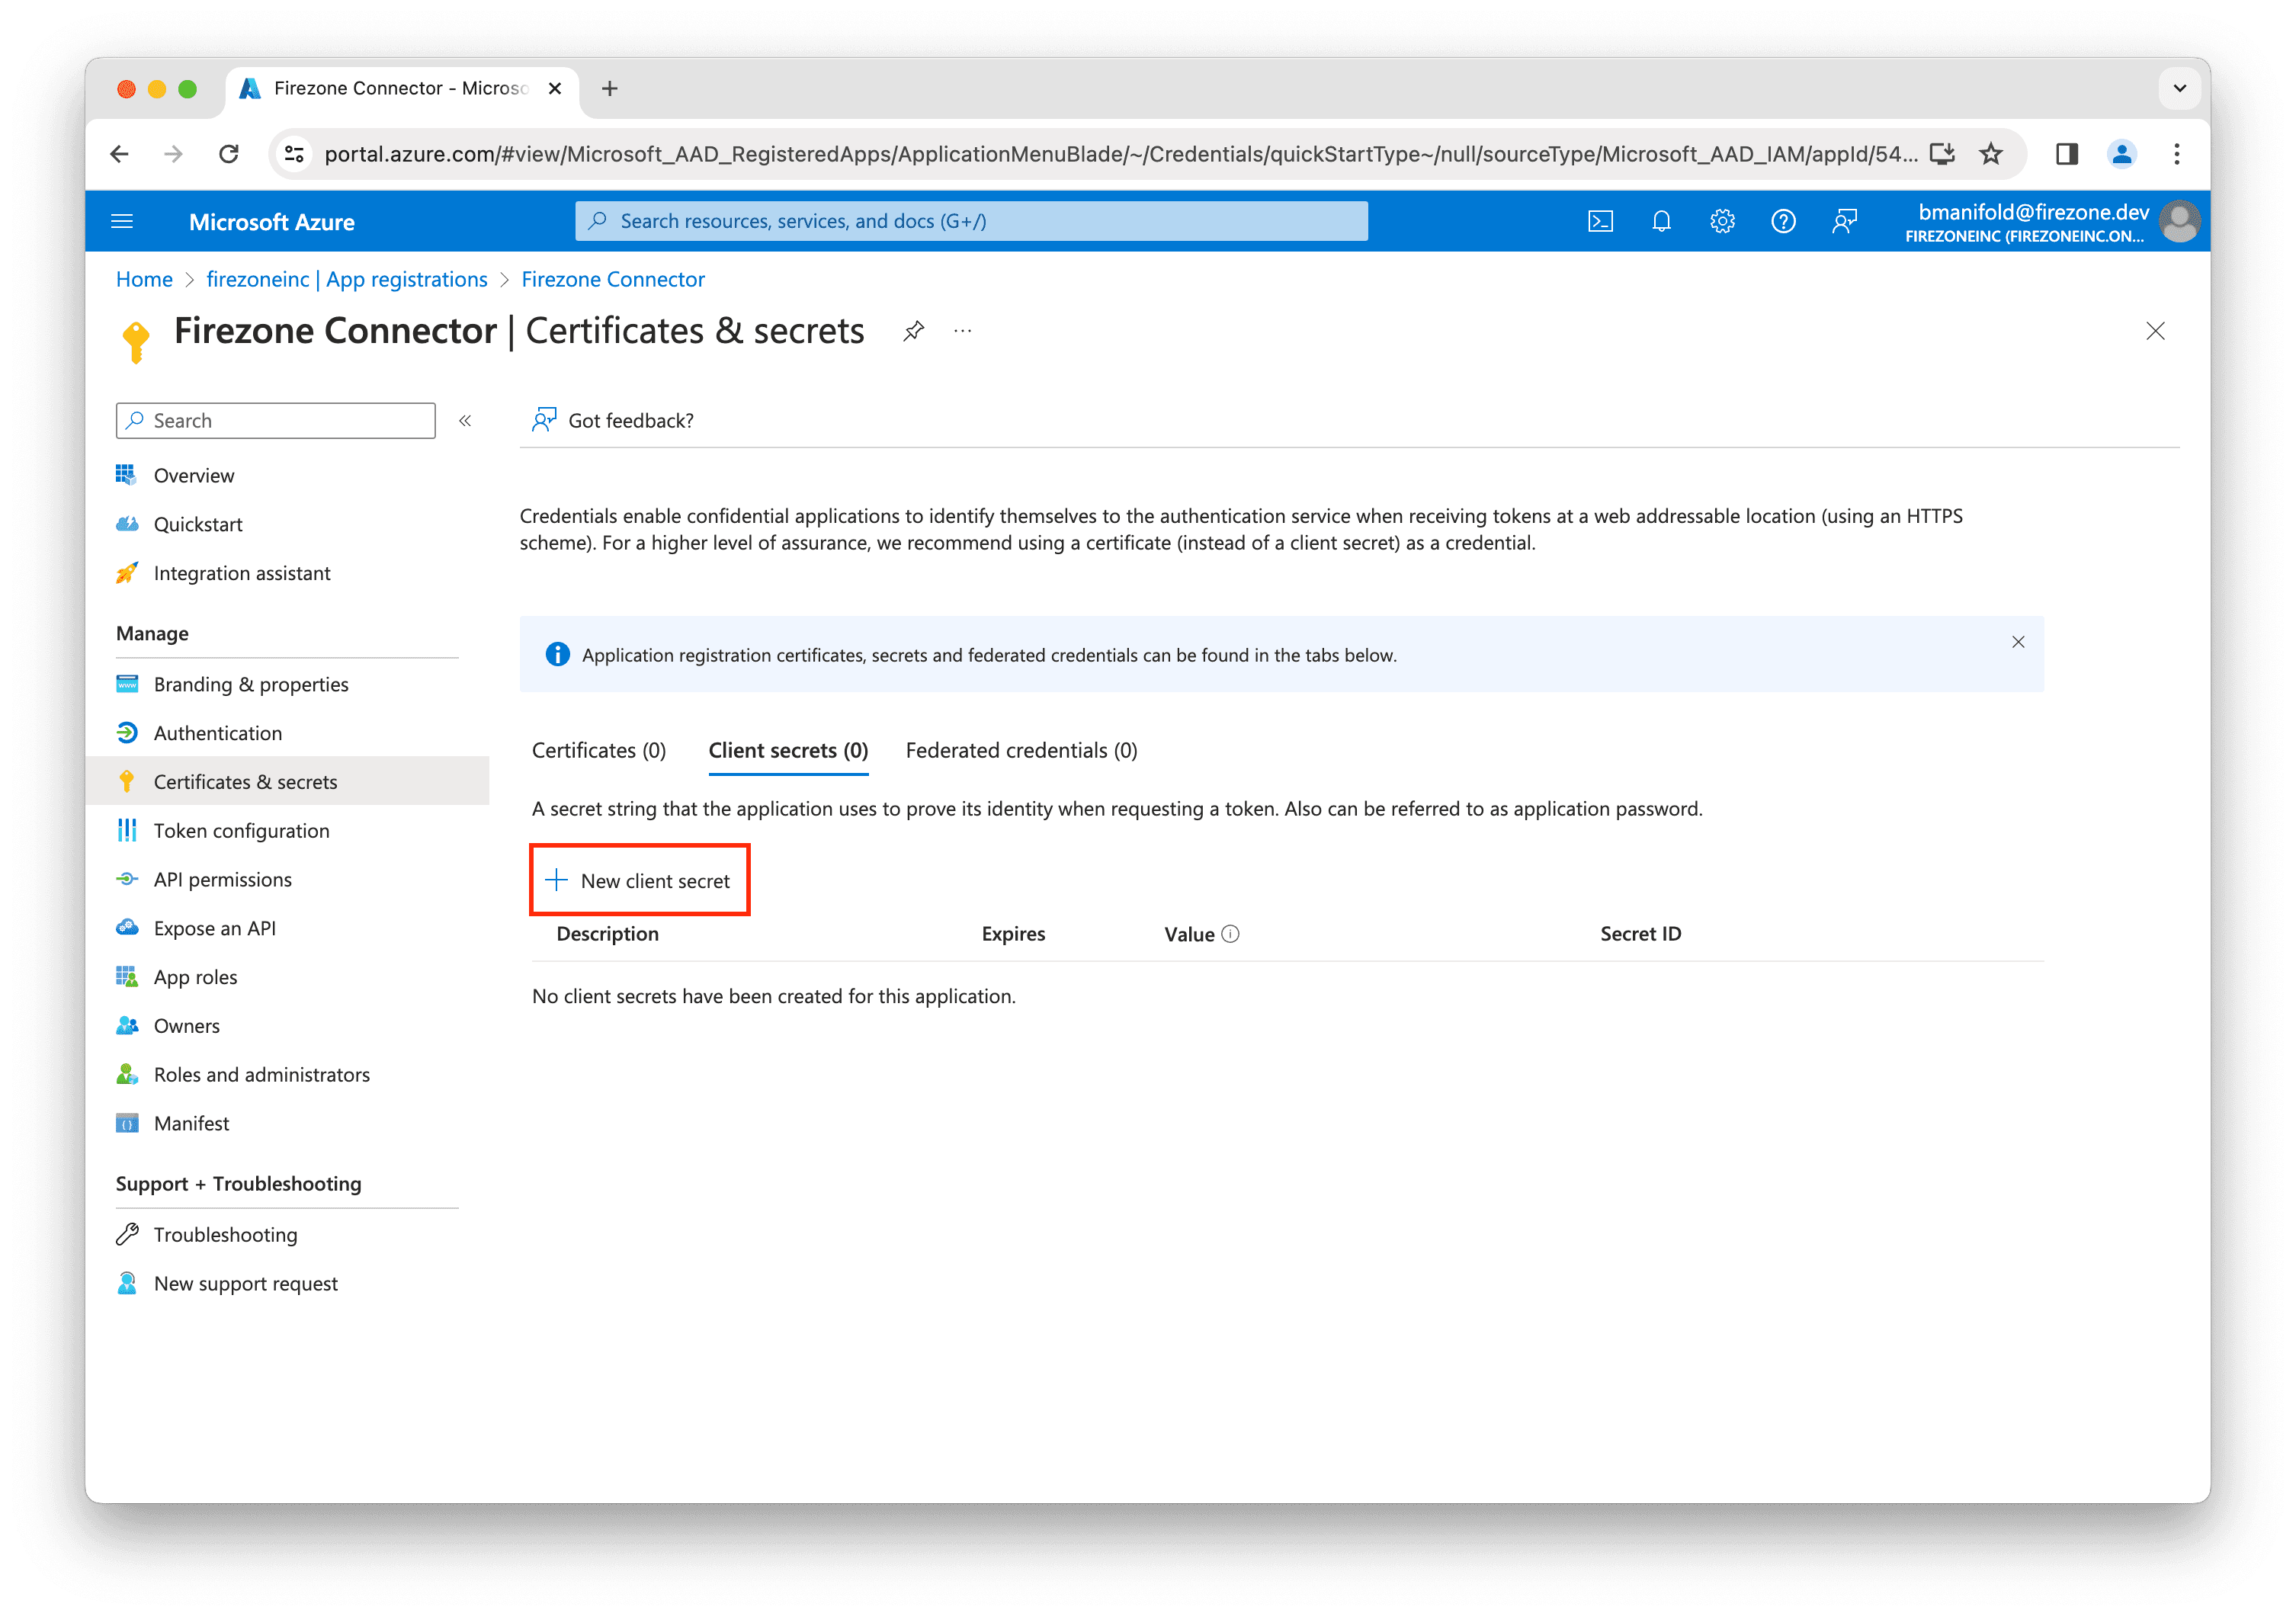
Enter Firezone Connector for the description, then select an appropriate lifetime for the secret and click Add.

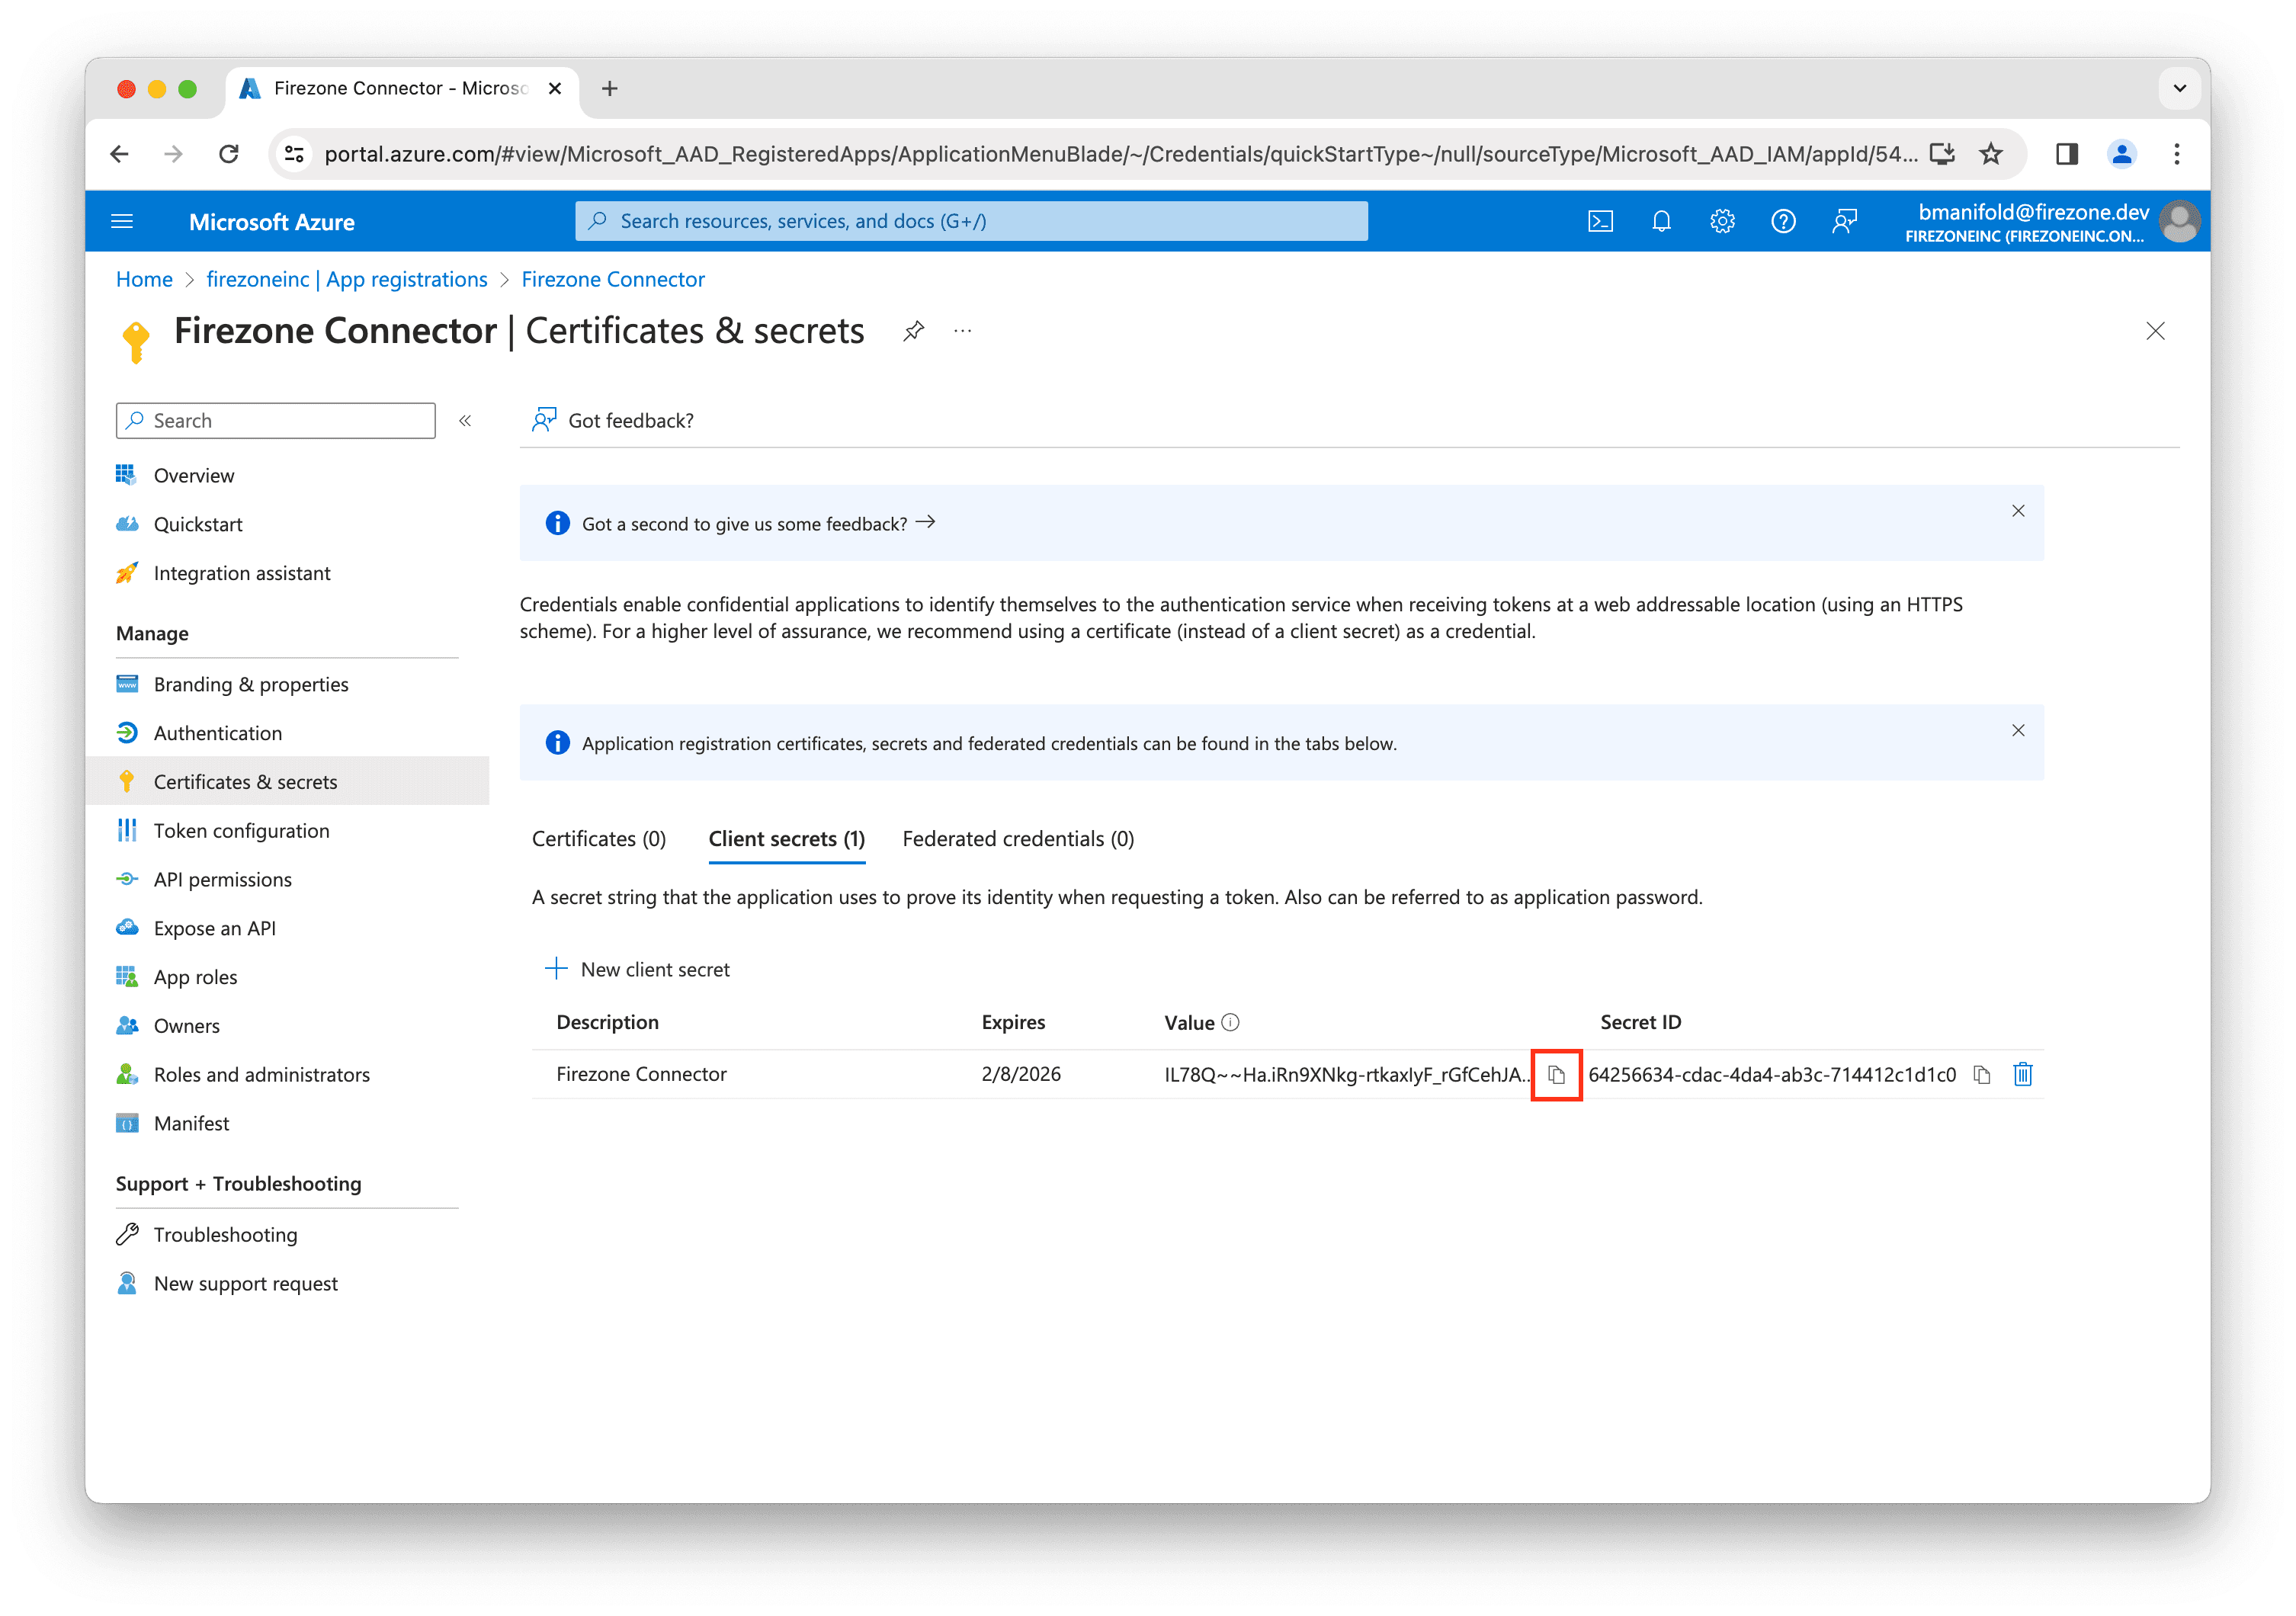
On the next screen, copy the value of the client secret and save it in a safe place.
Enter this value into the Client secret field in the setup page in the
Firezone admin portal.
Step 4: Add permissions
Next, you'll need to add permissions to the app registration to allow Firezone to read user and group data from your Entra ID account.
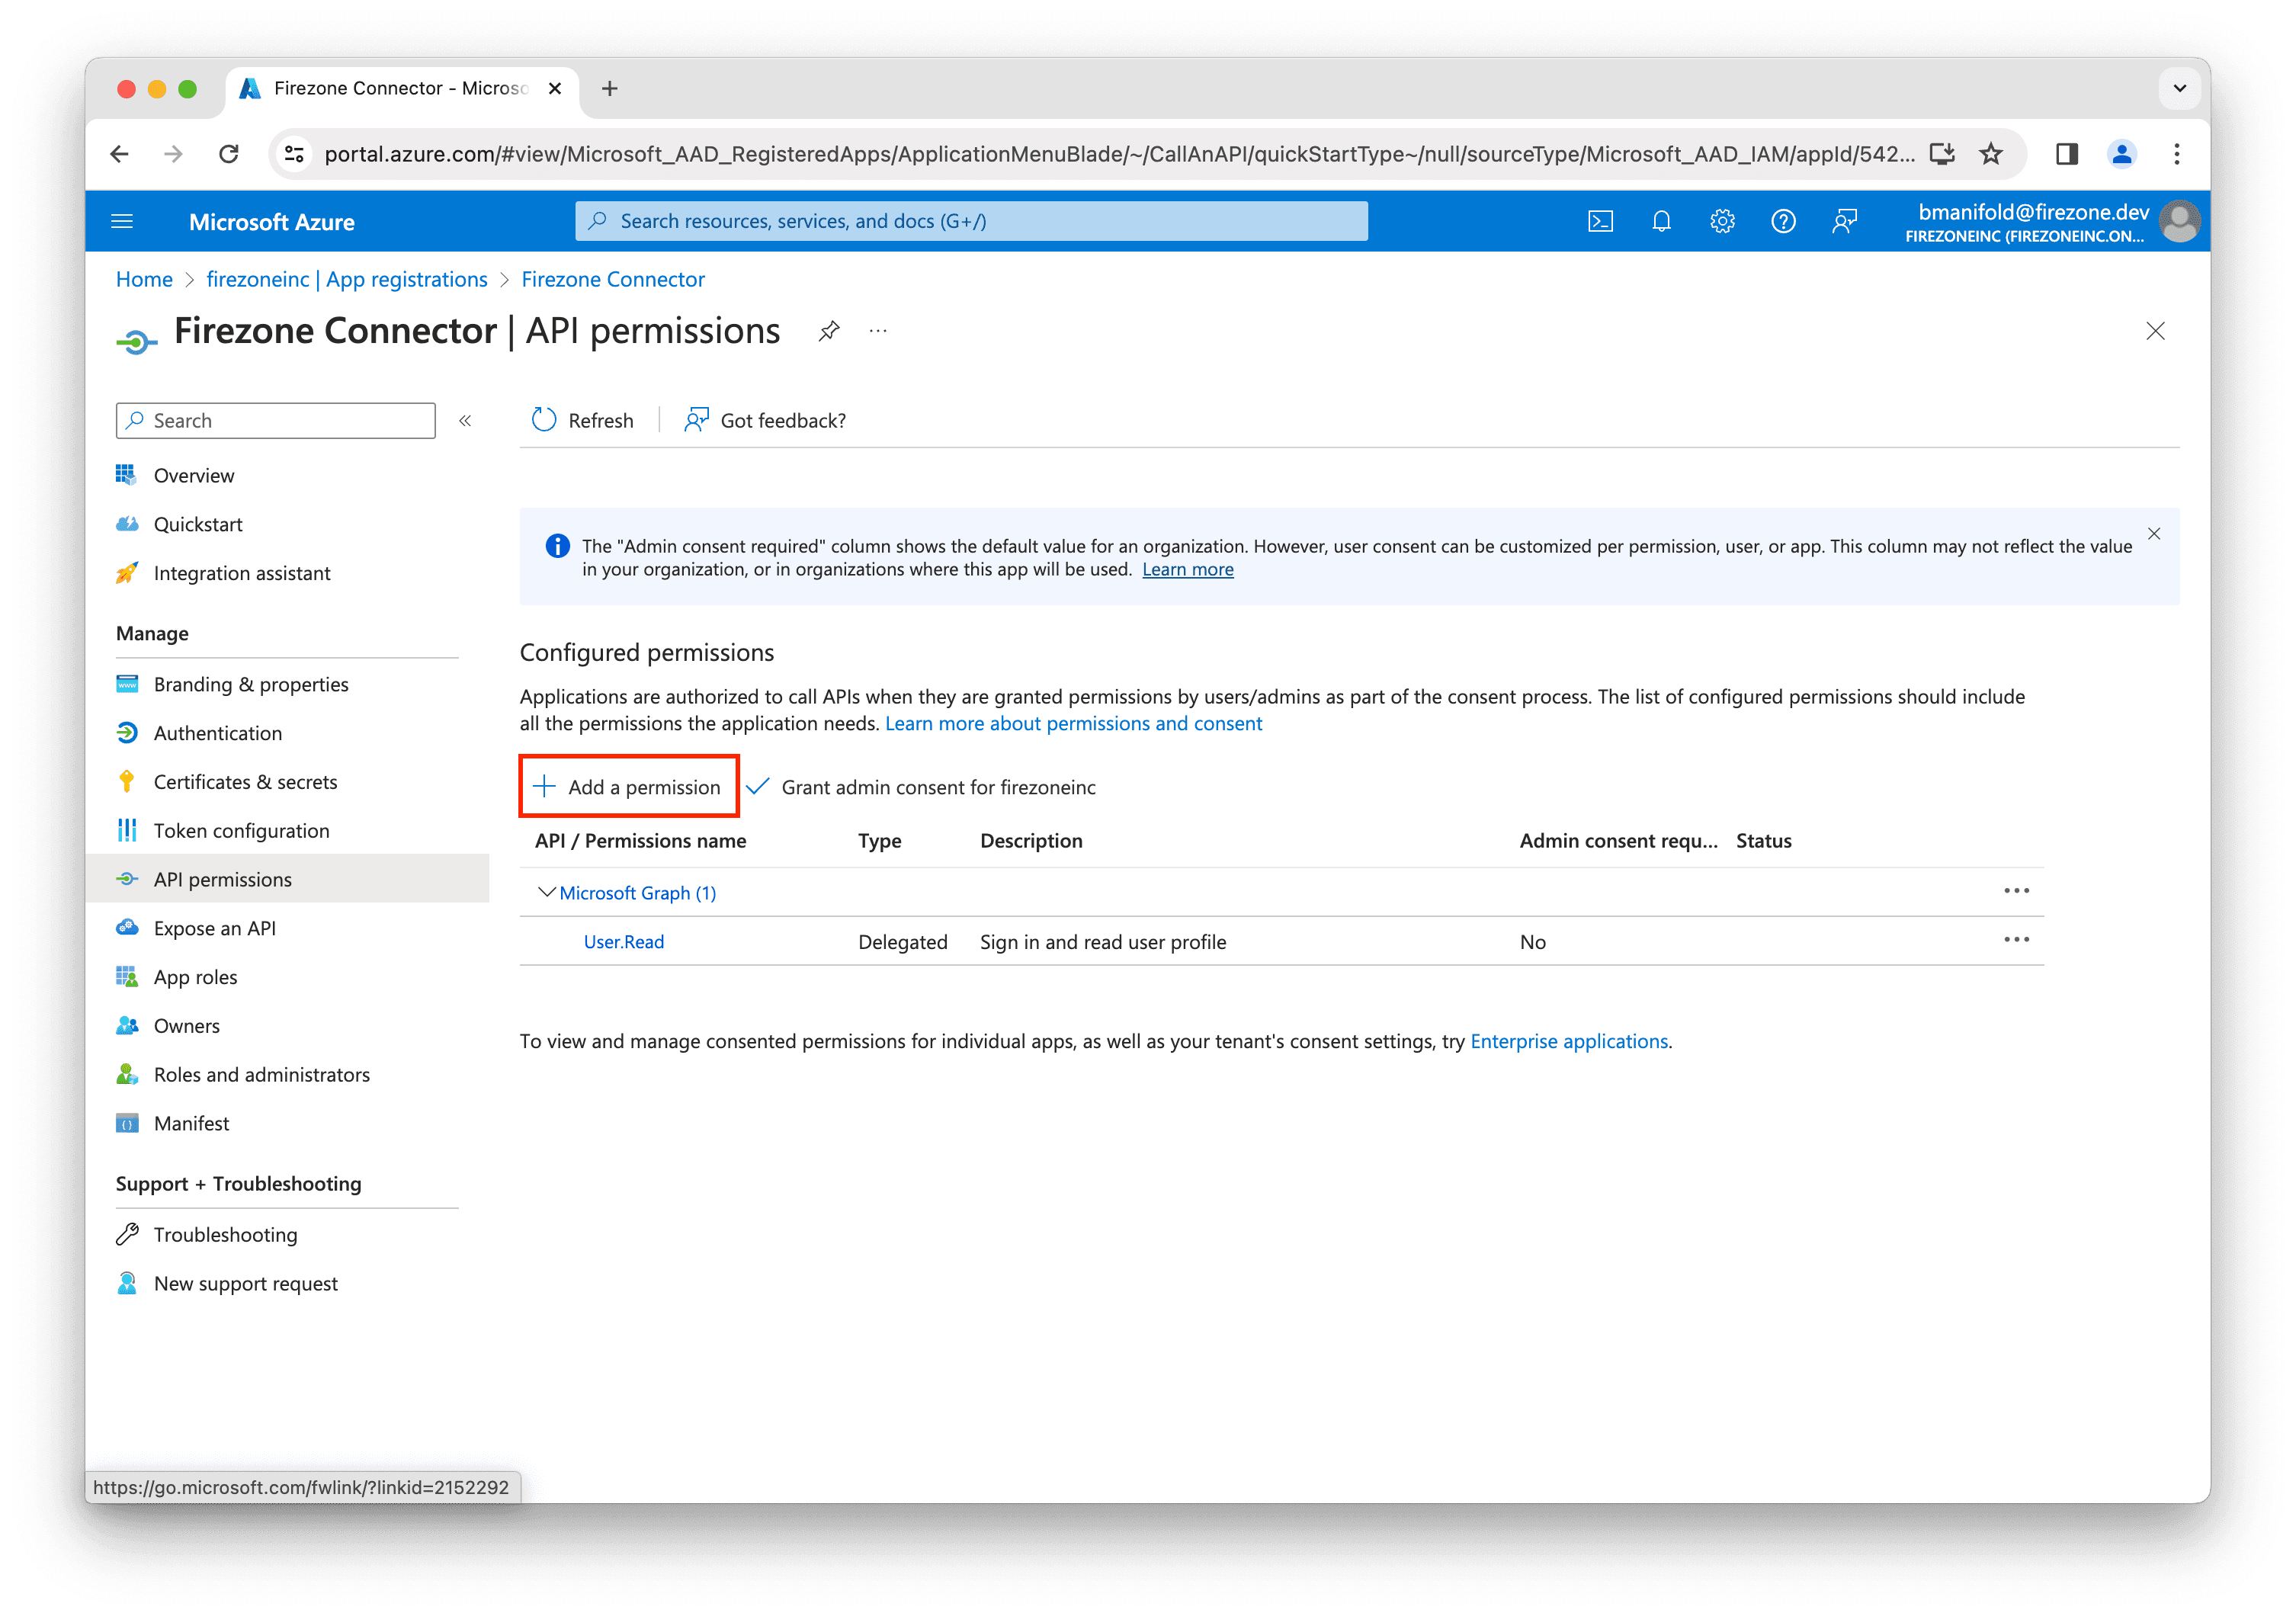
Go to API permissions in the left sidebar, then click Add a permission.
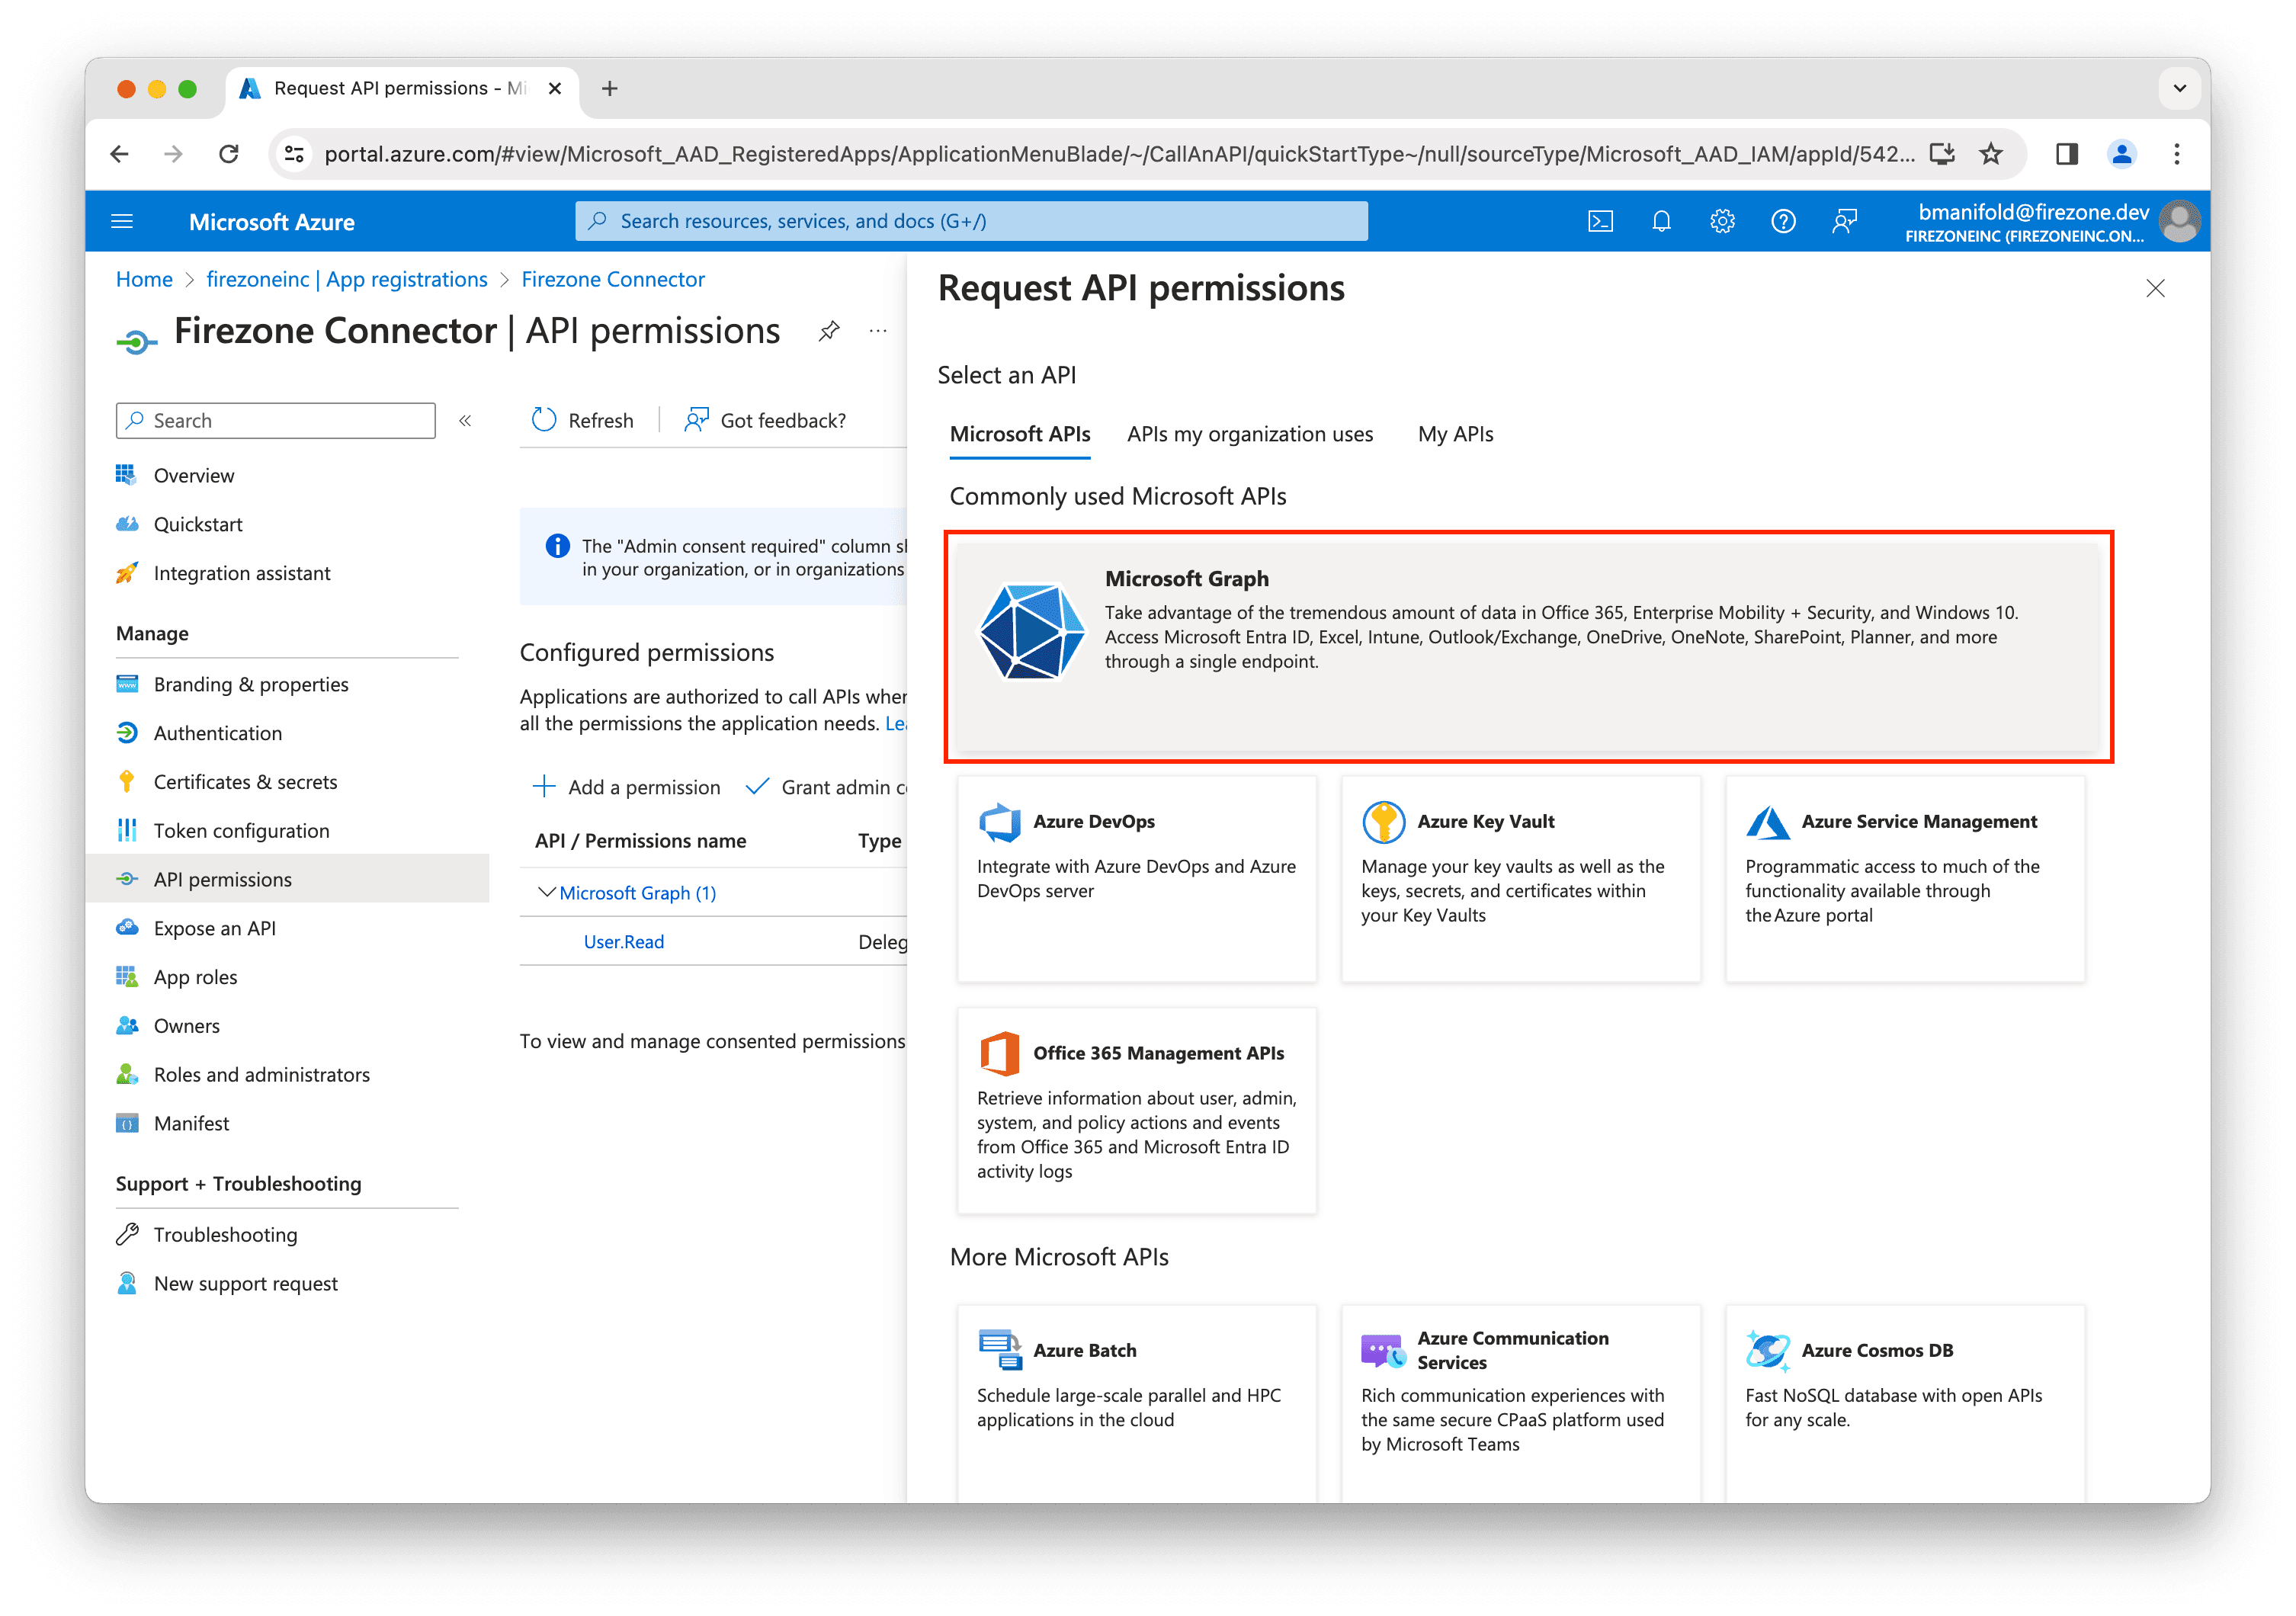
Select Microsoft Graph.
Select Delegated permissions.

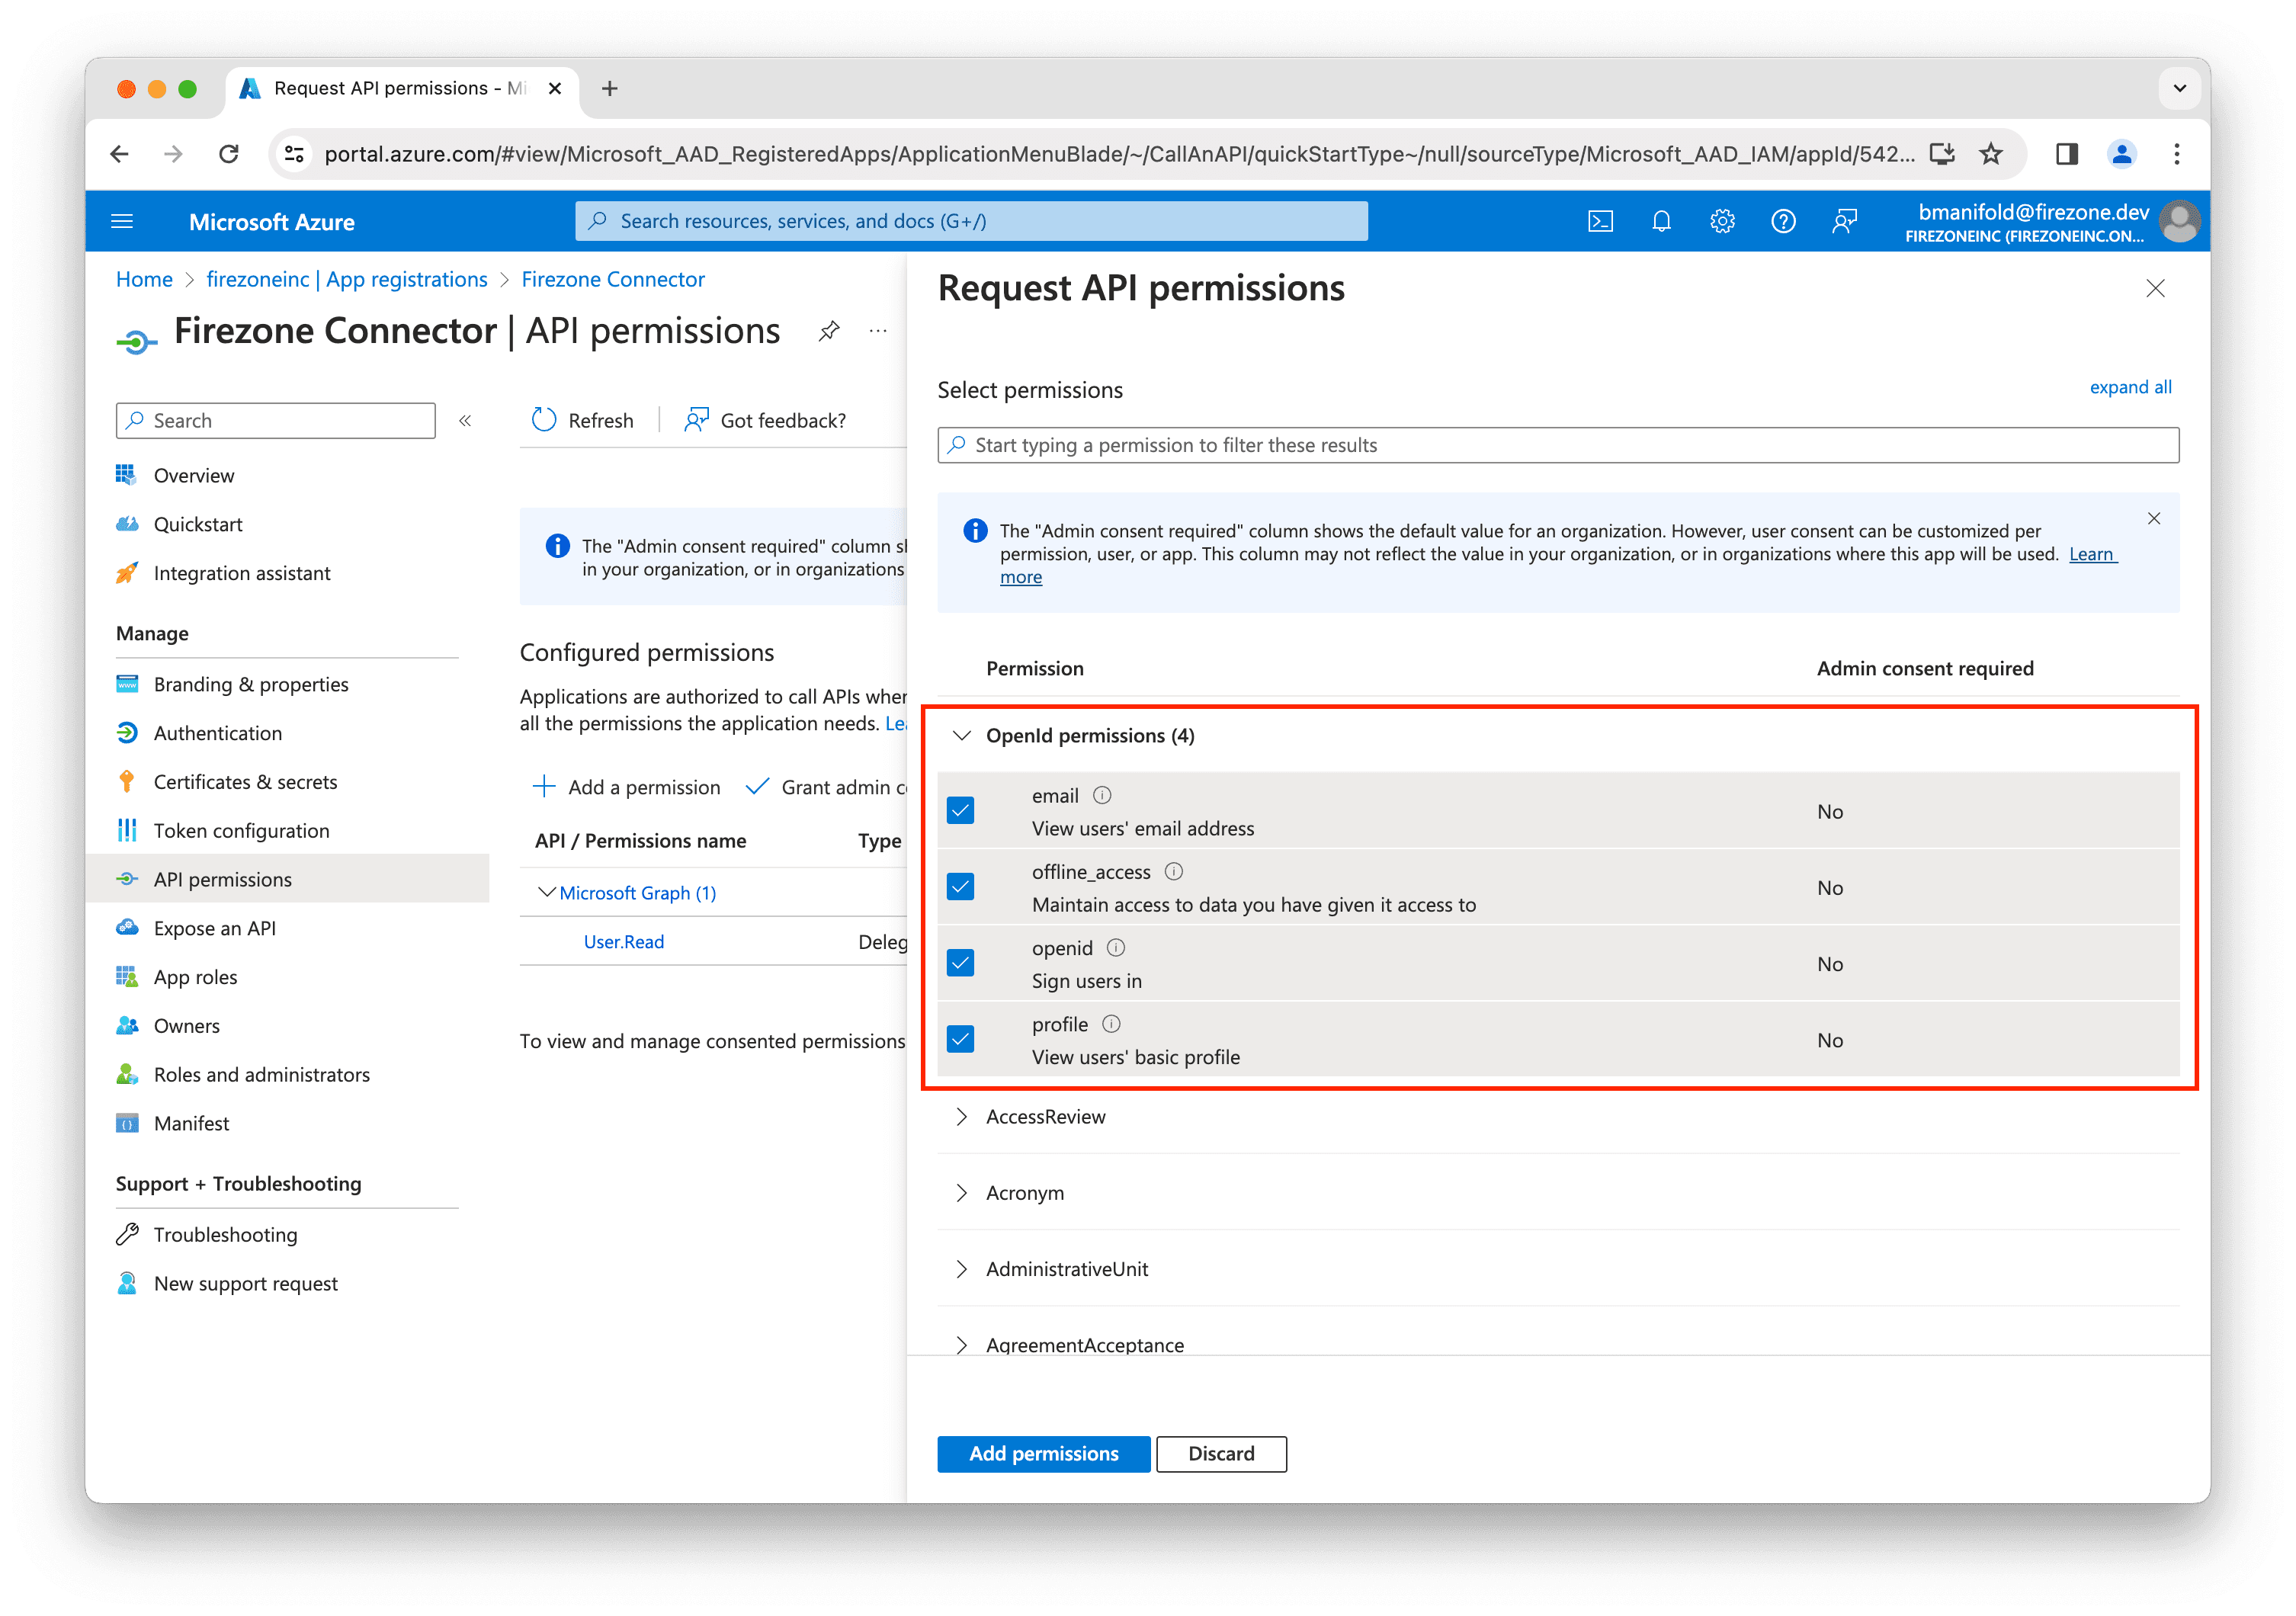
In the next screen, ensure the following OpenId permissions are selected:
emailoffline_accessopenidprofile
Next, make sure the following Group and User permissions are selected:
Group.Read.AllGroupMember.Read.AllUser.ReadUser.Read.All
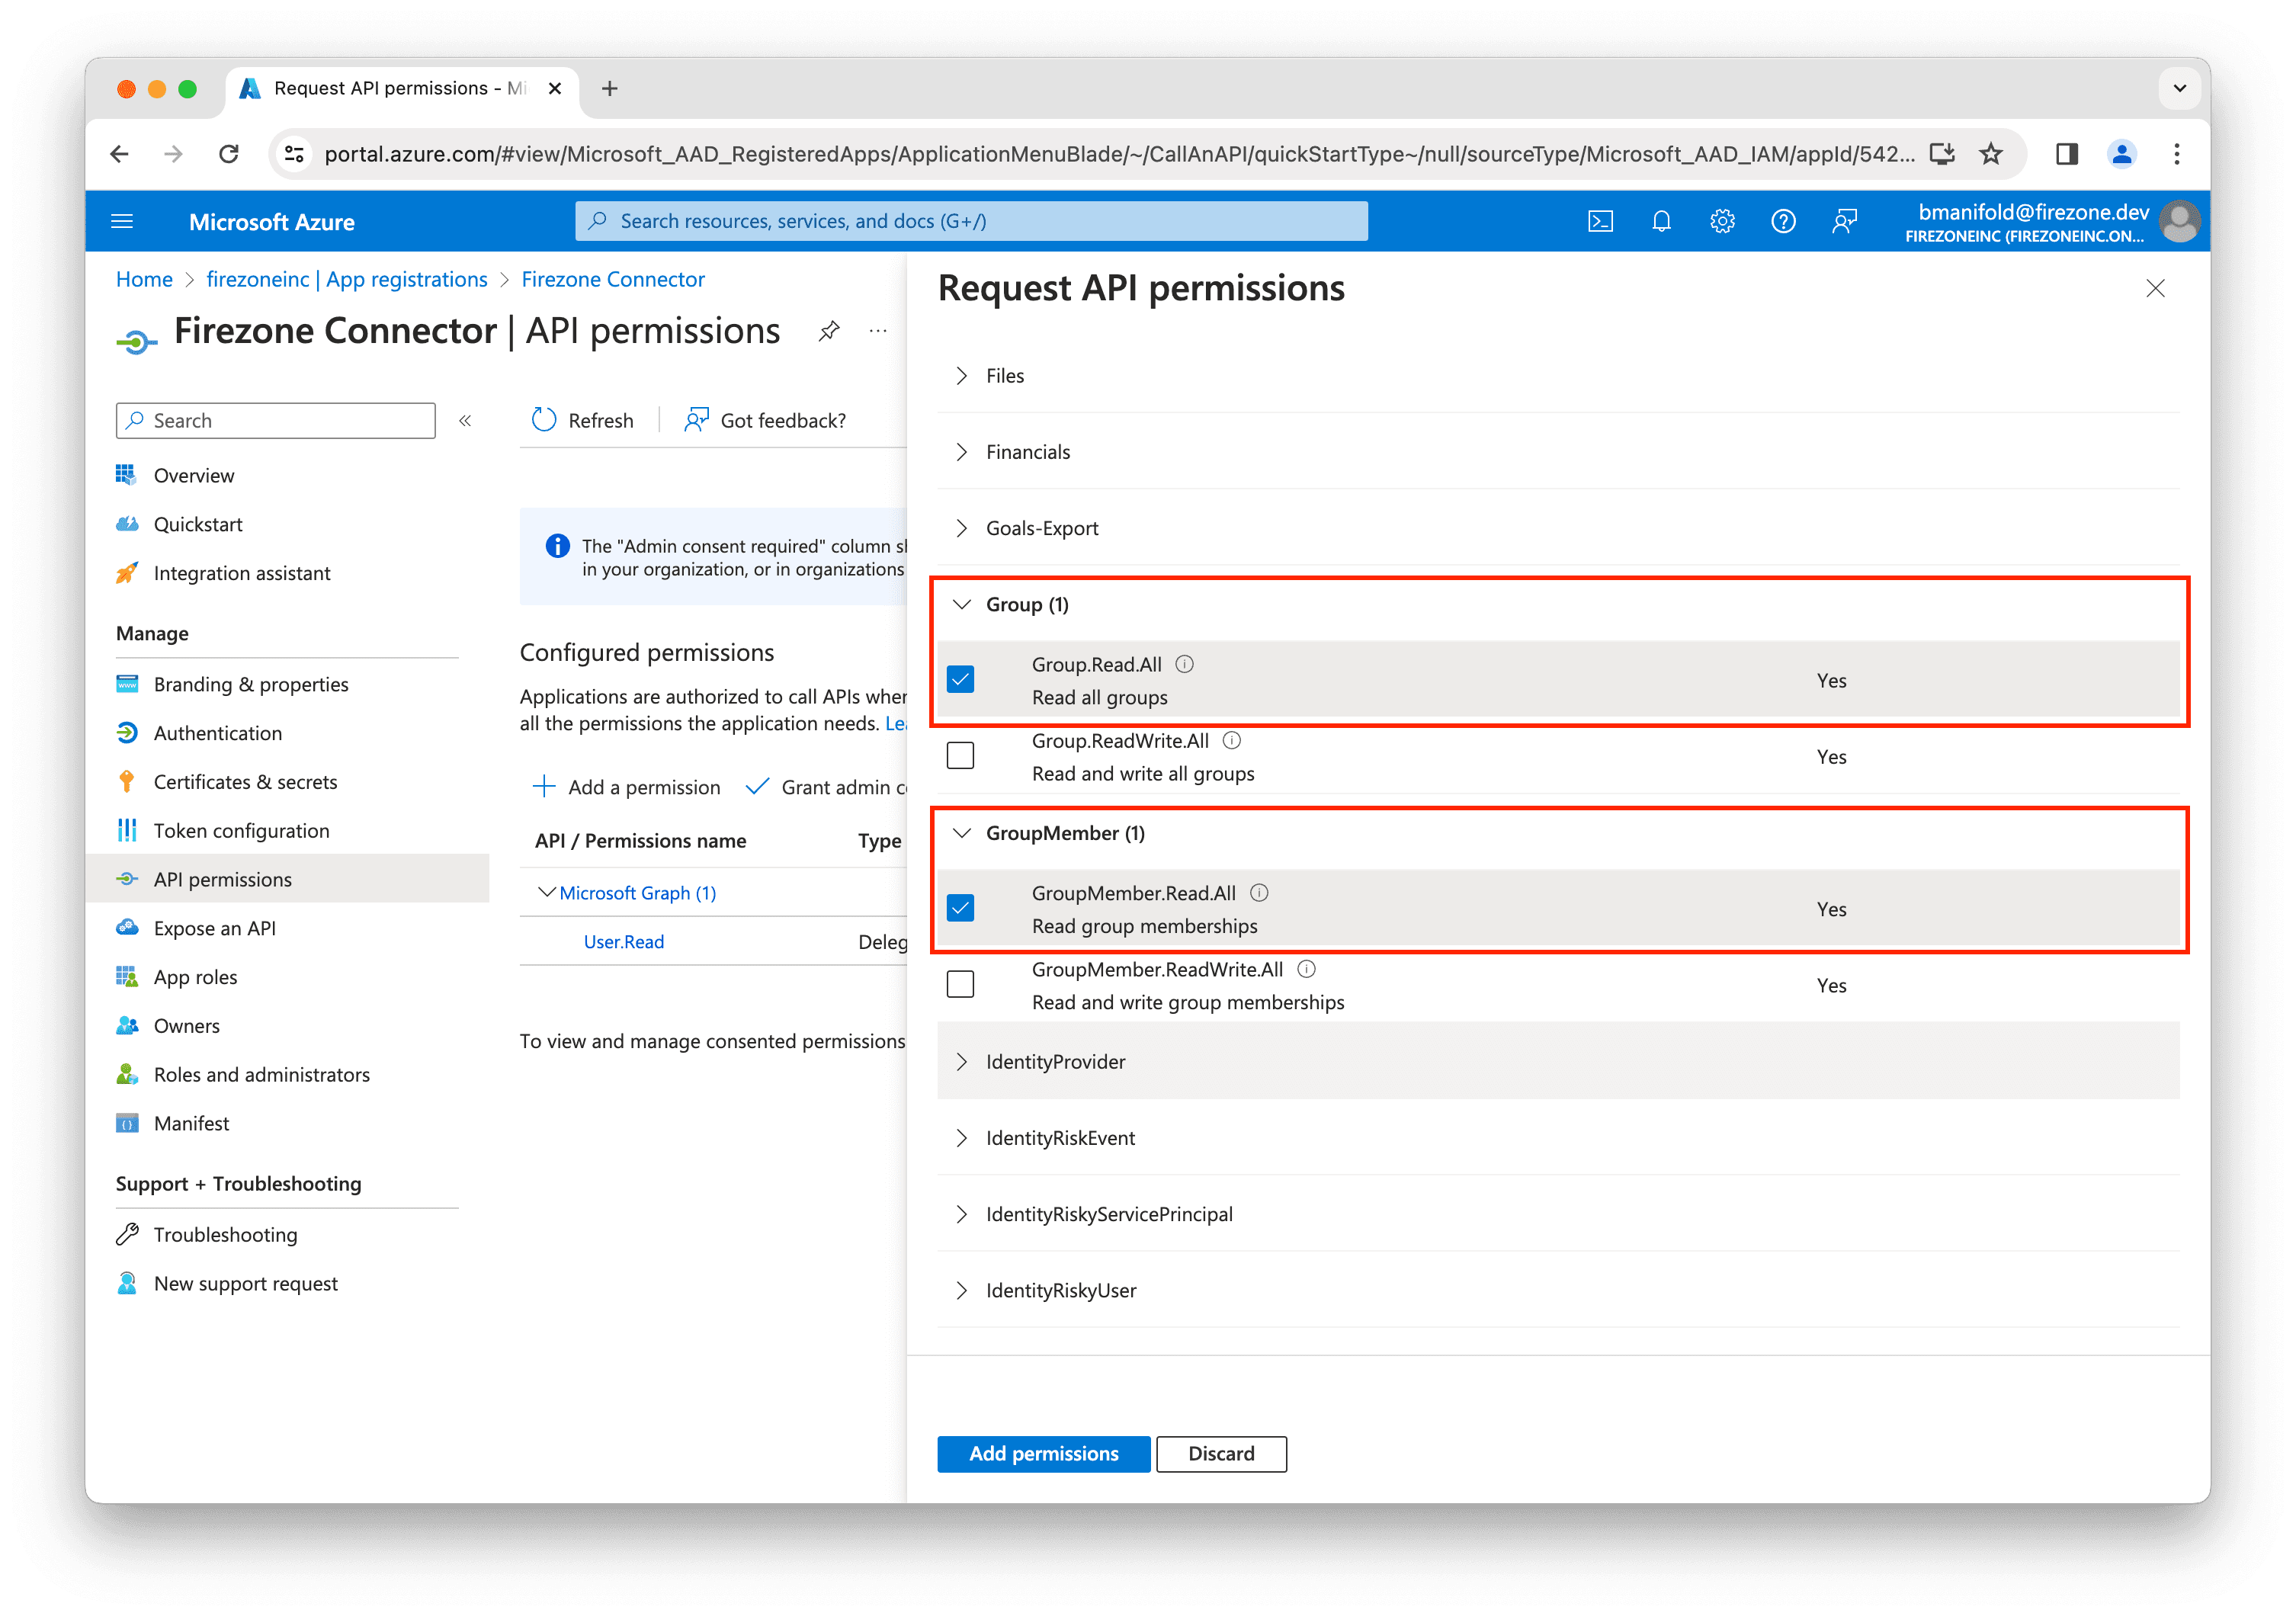
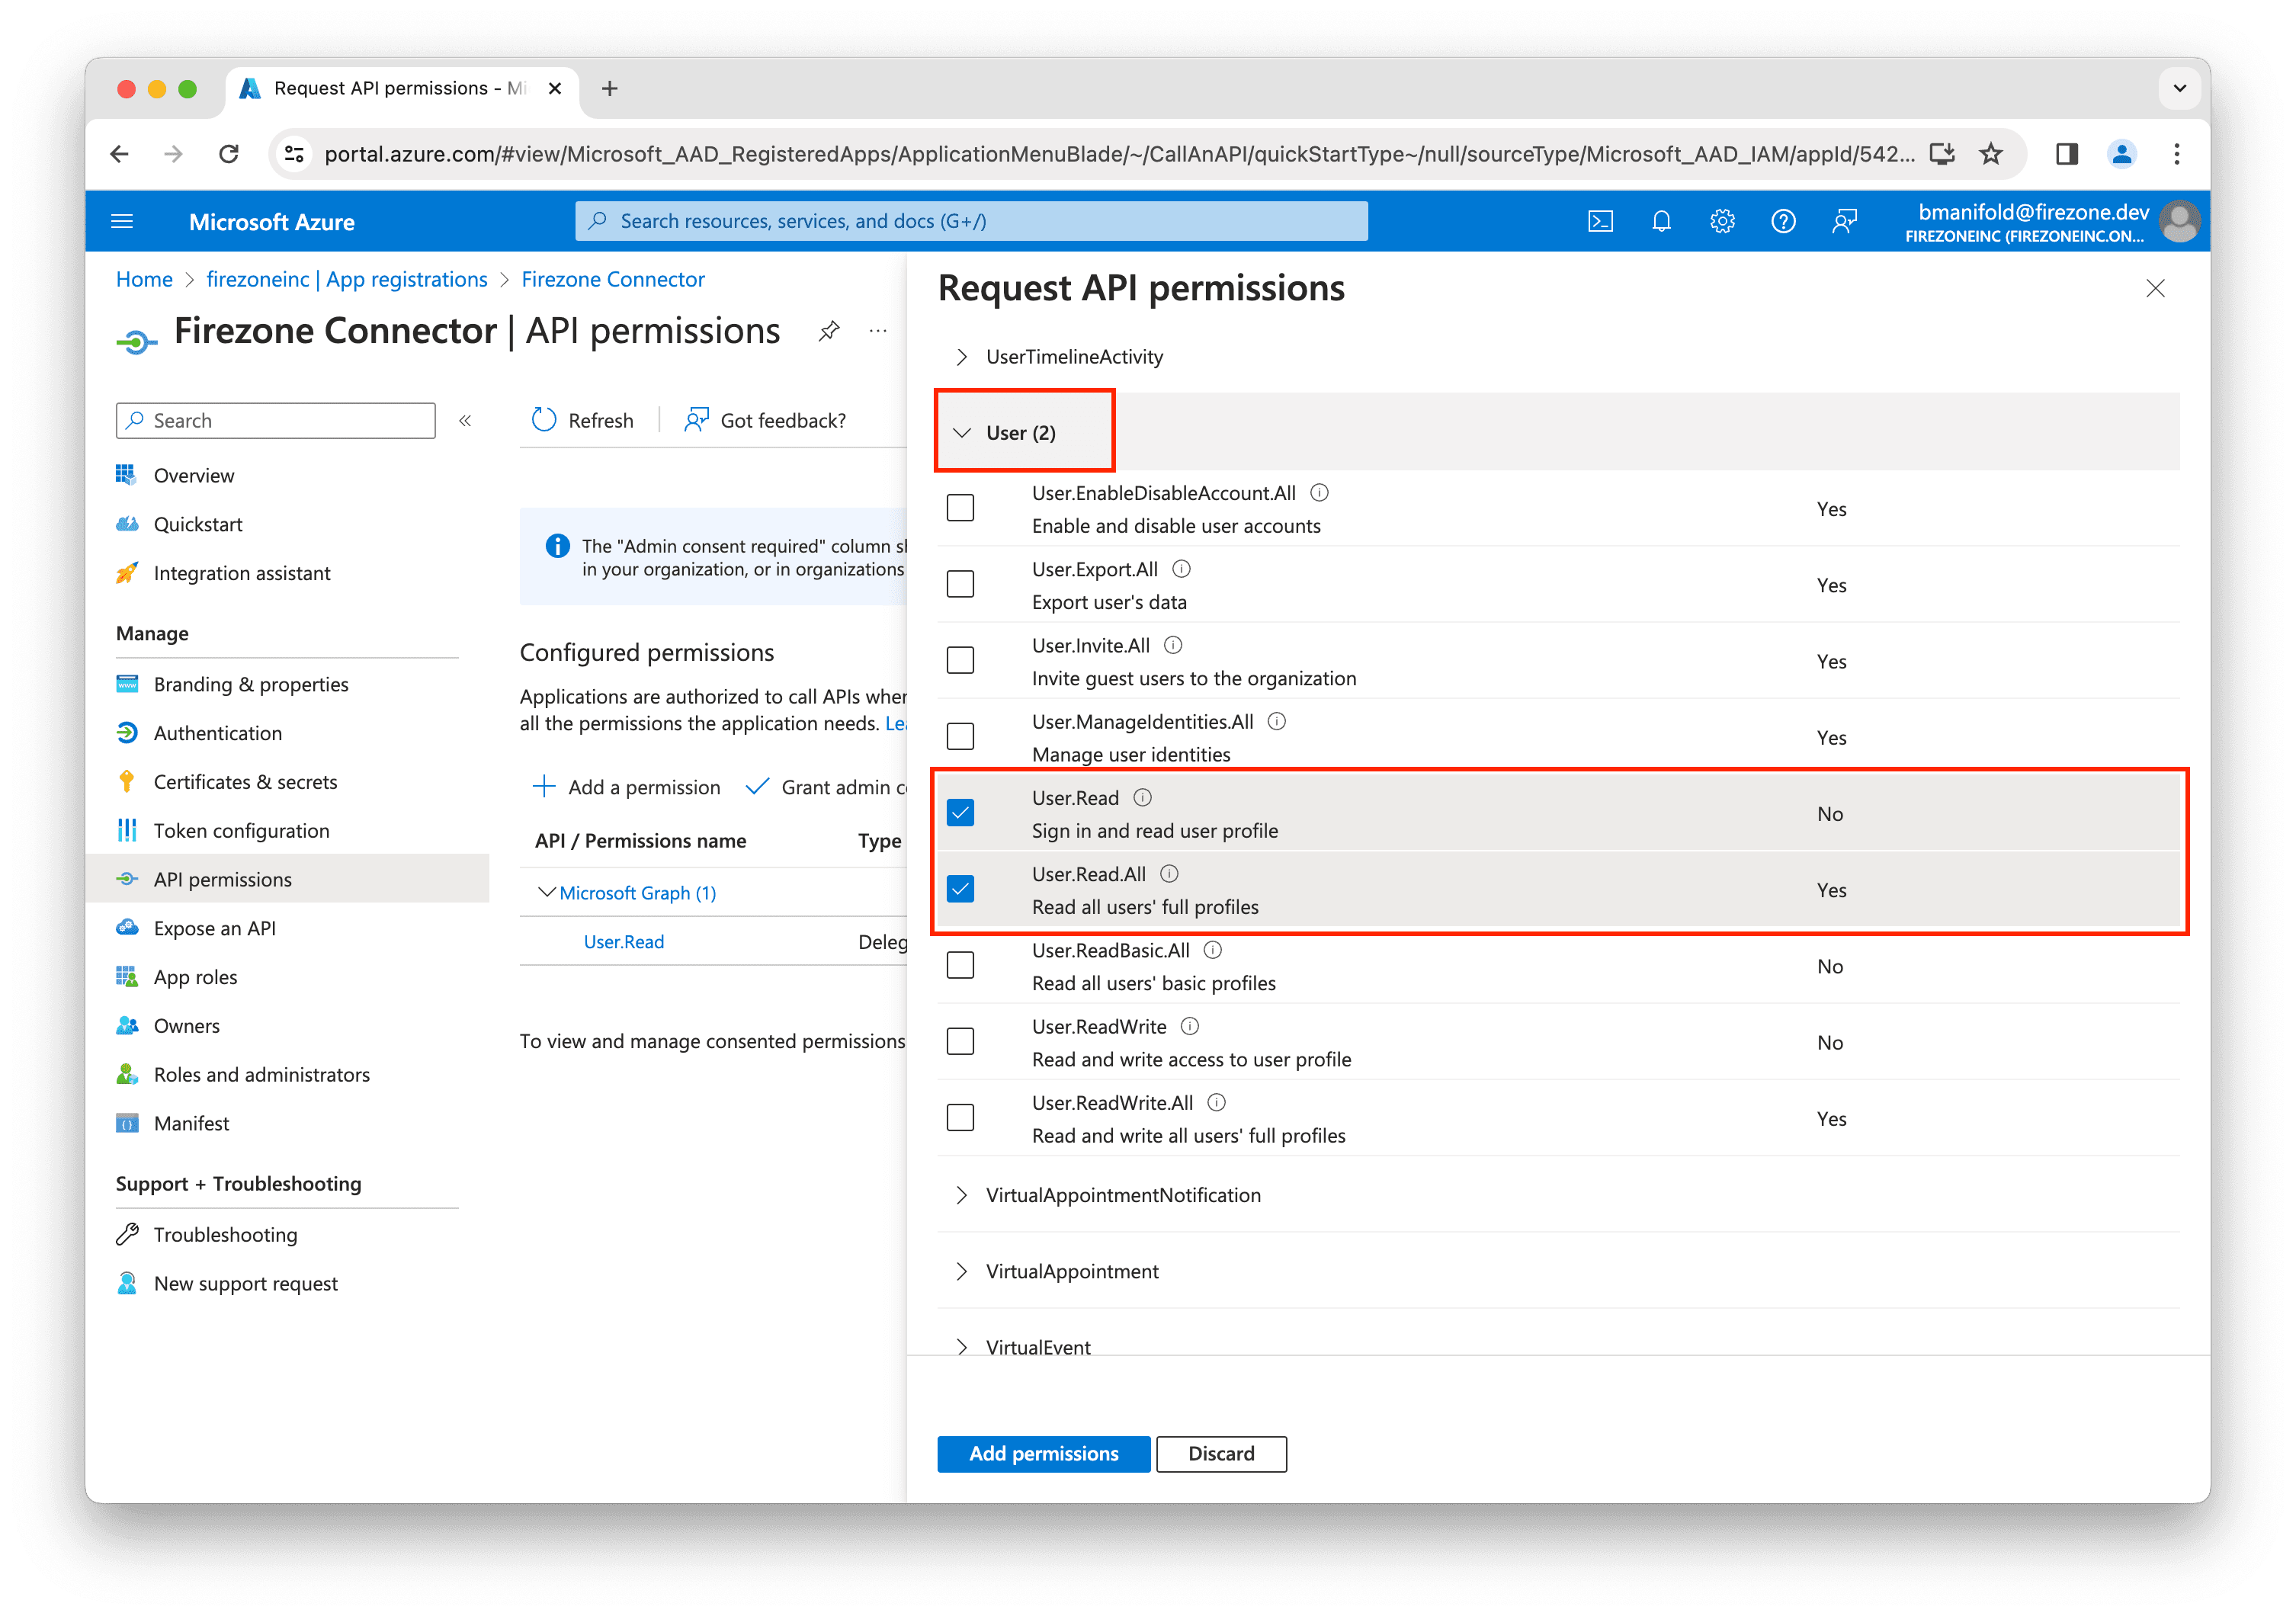
Click Add permissions to save your changes.
On the following screen, click Grant admin consent for
[your organization name].
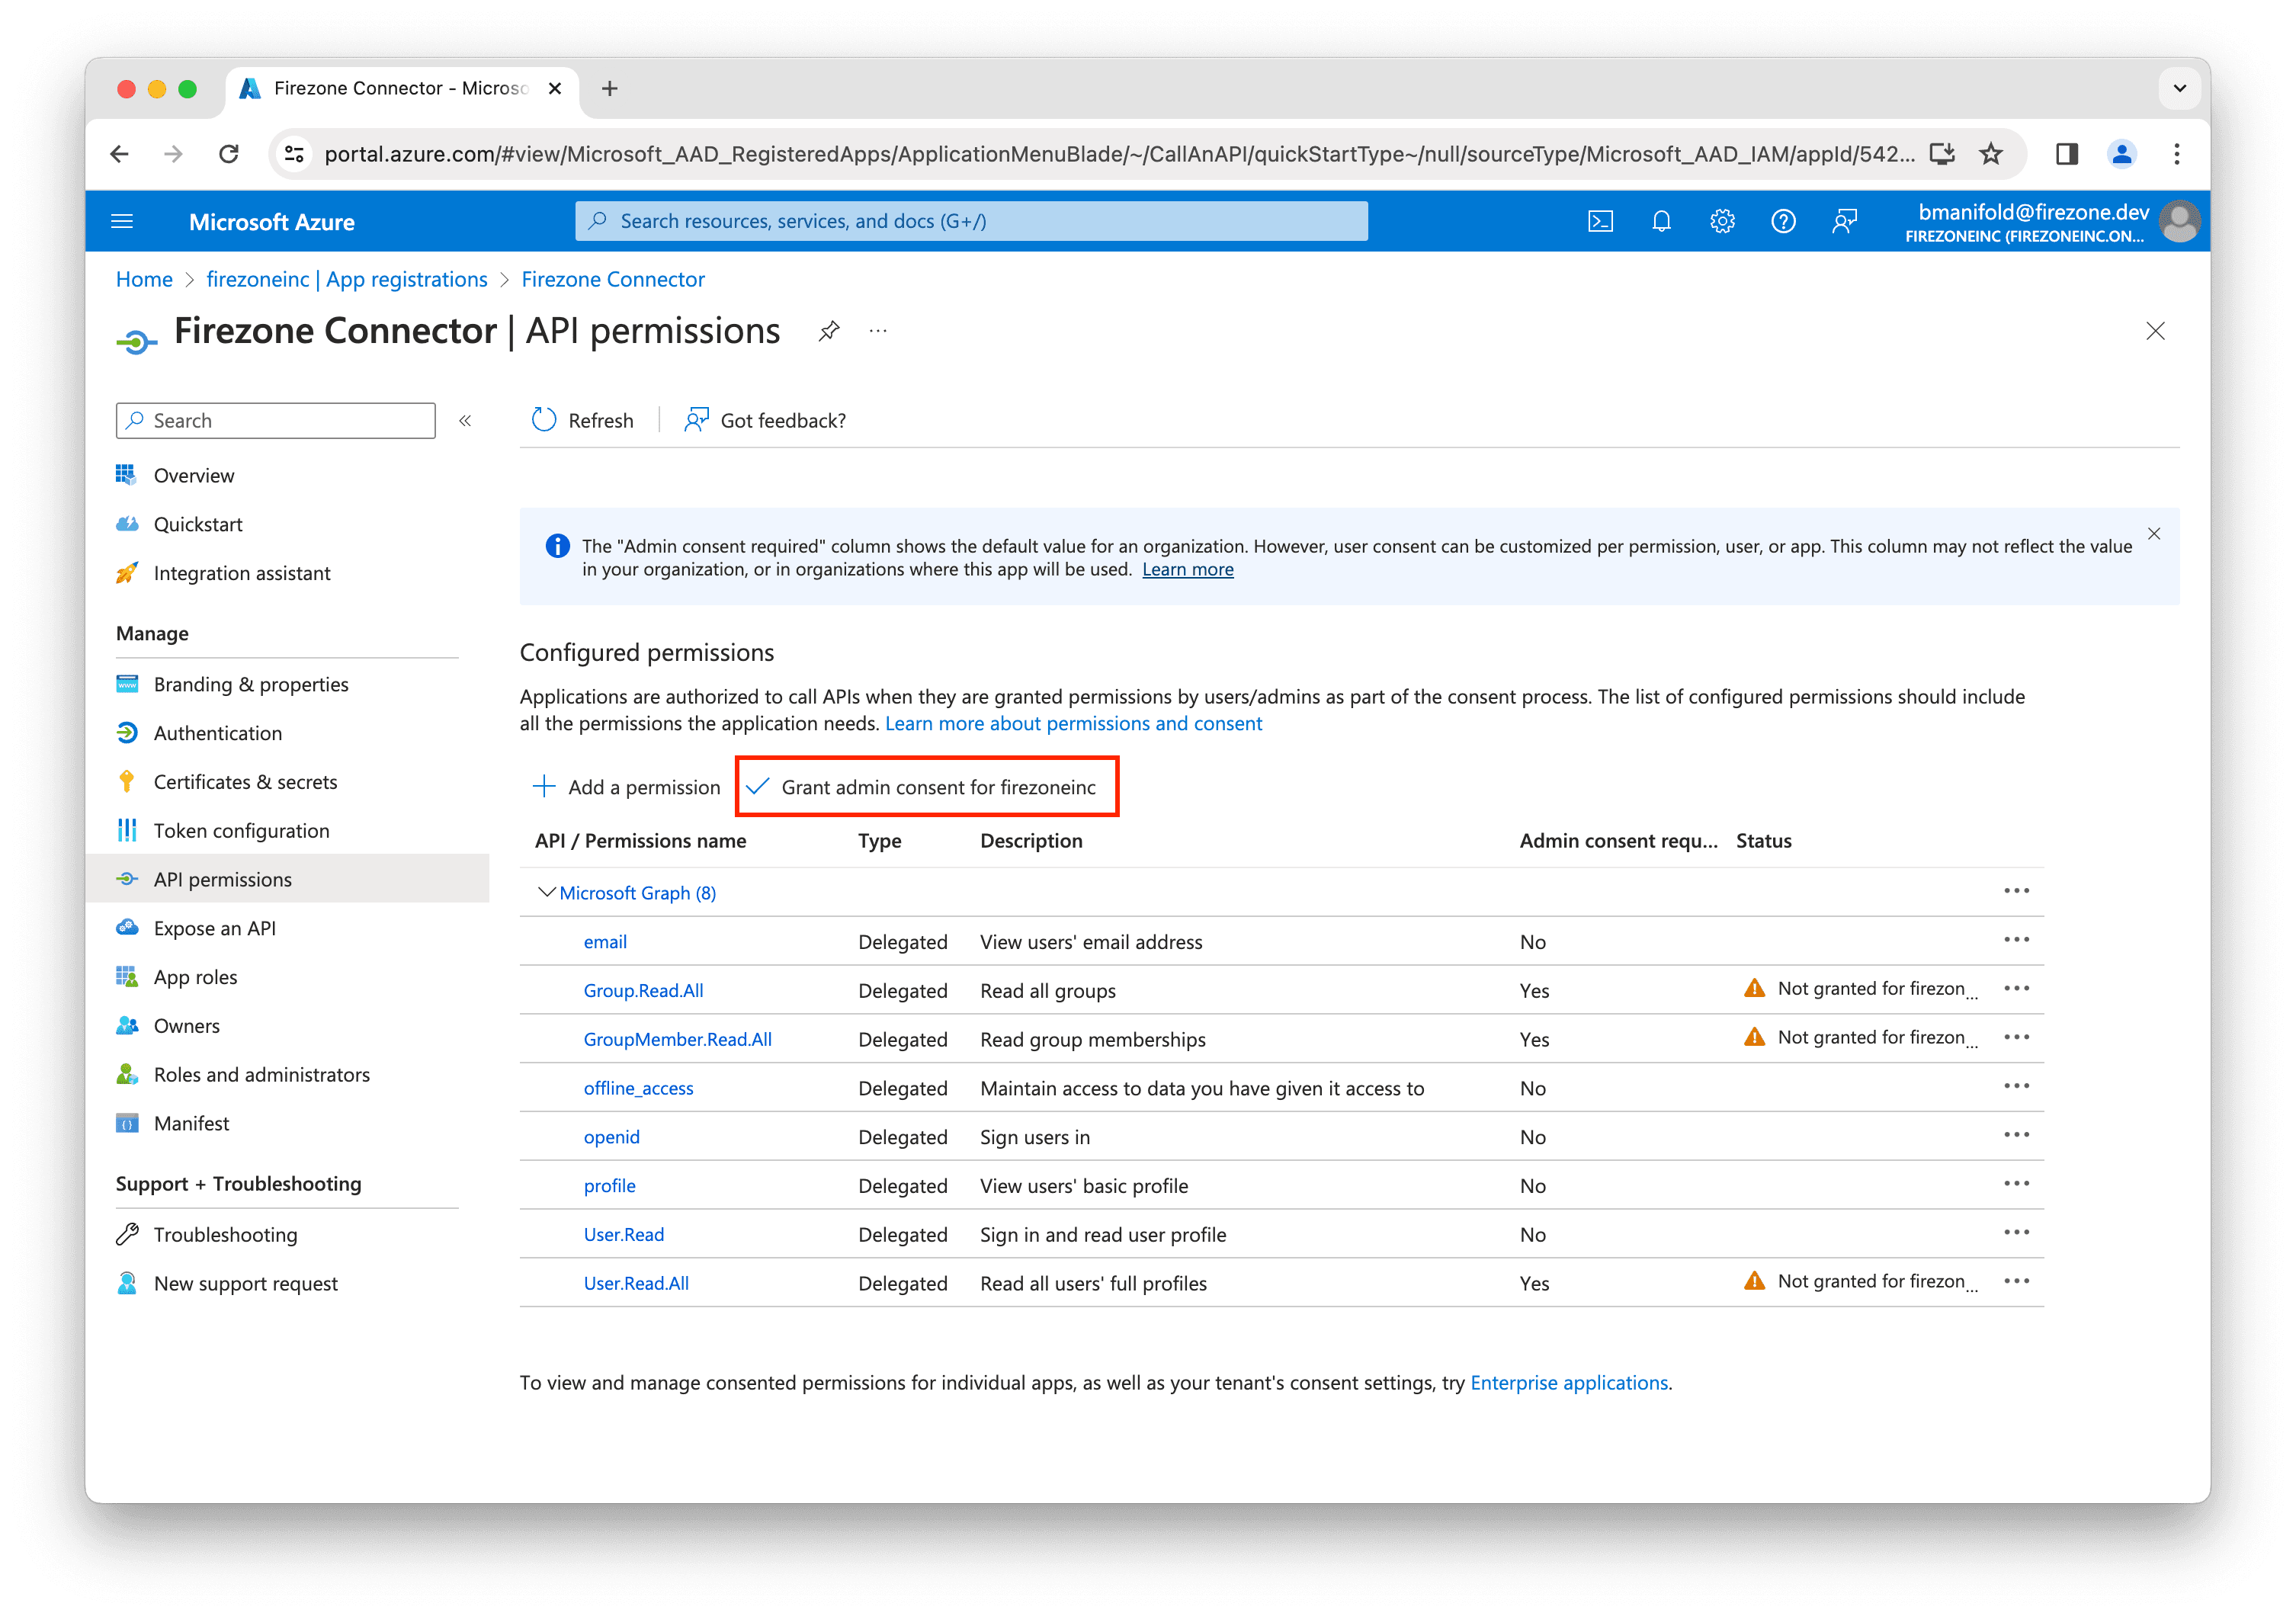
Click Yes to confirm.
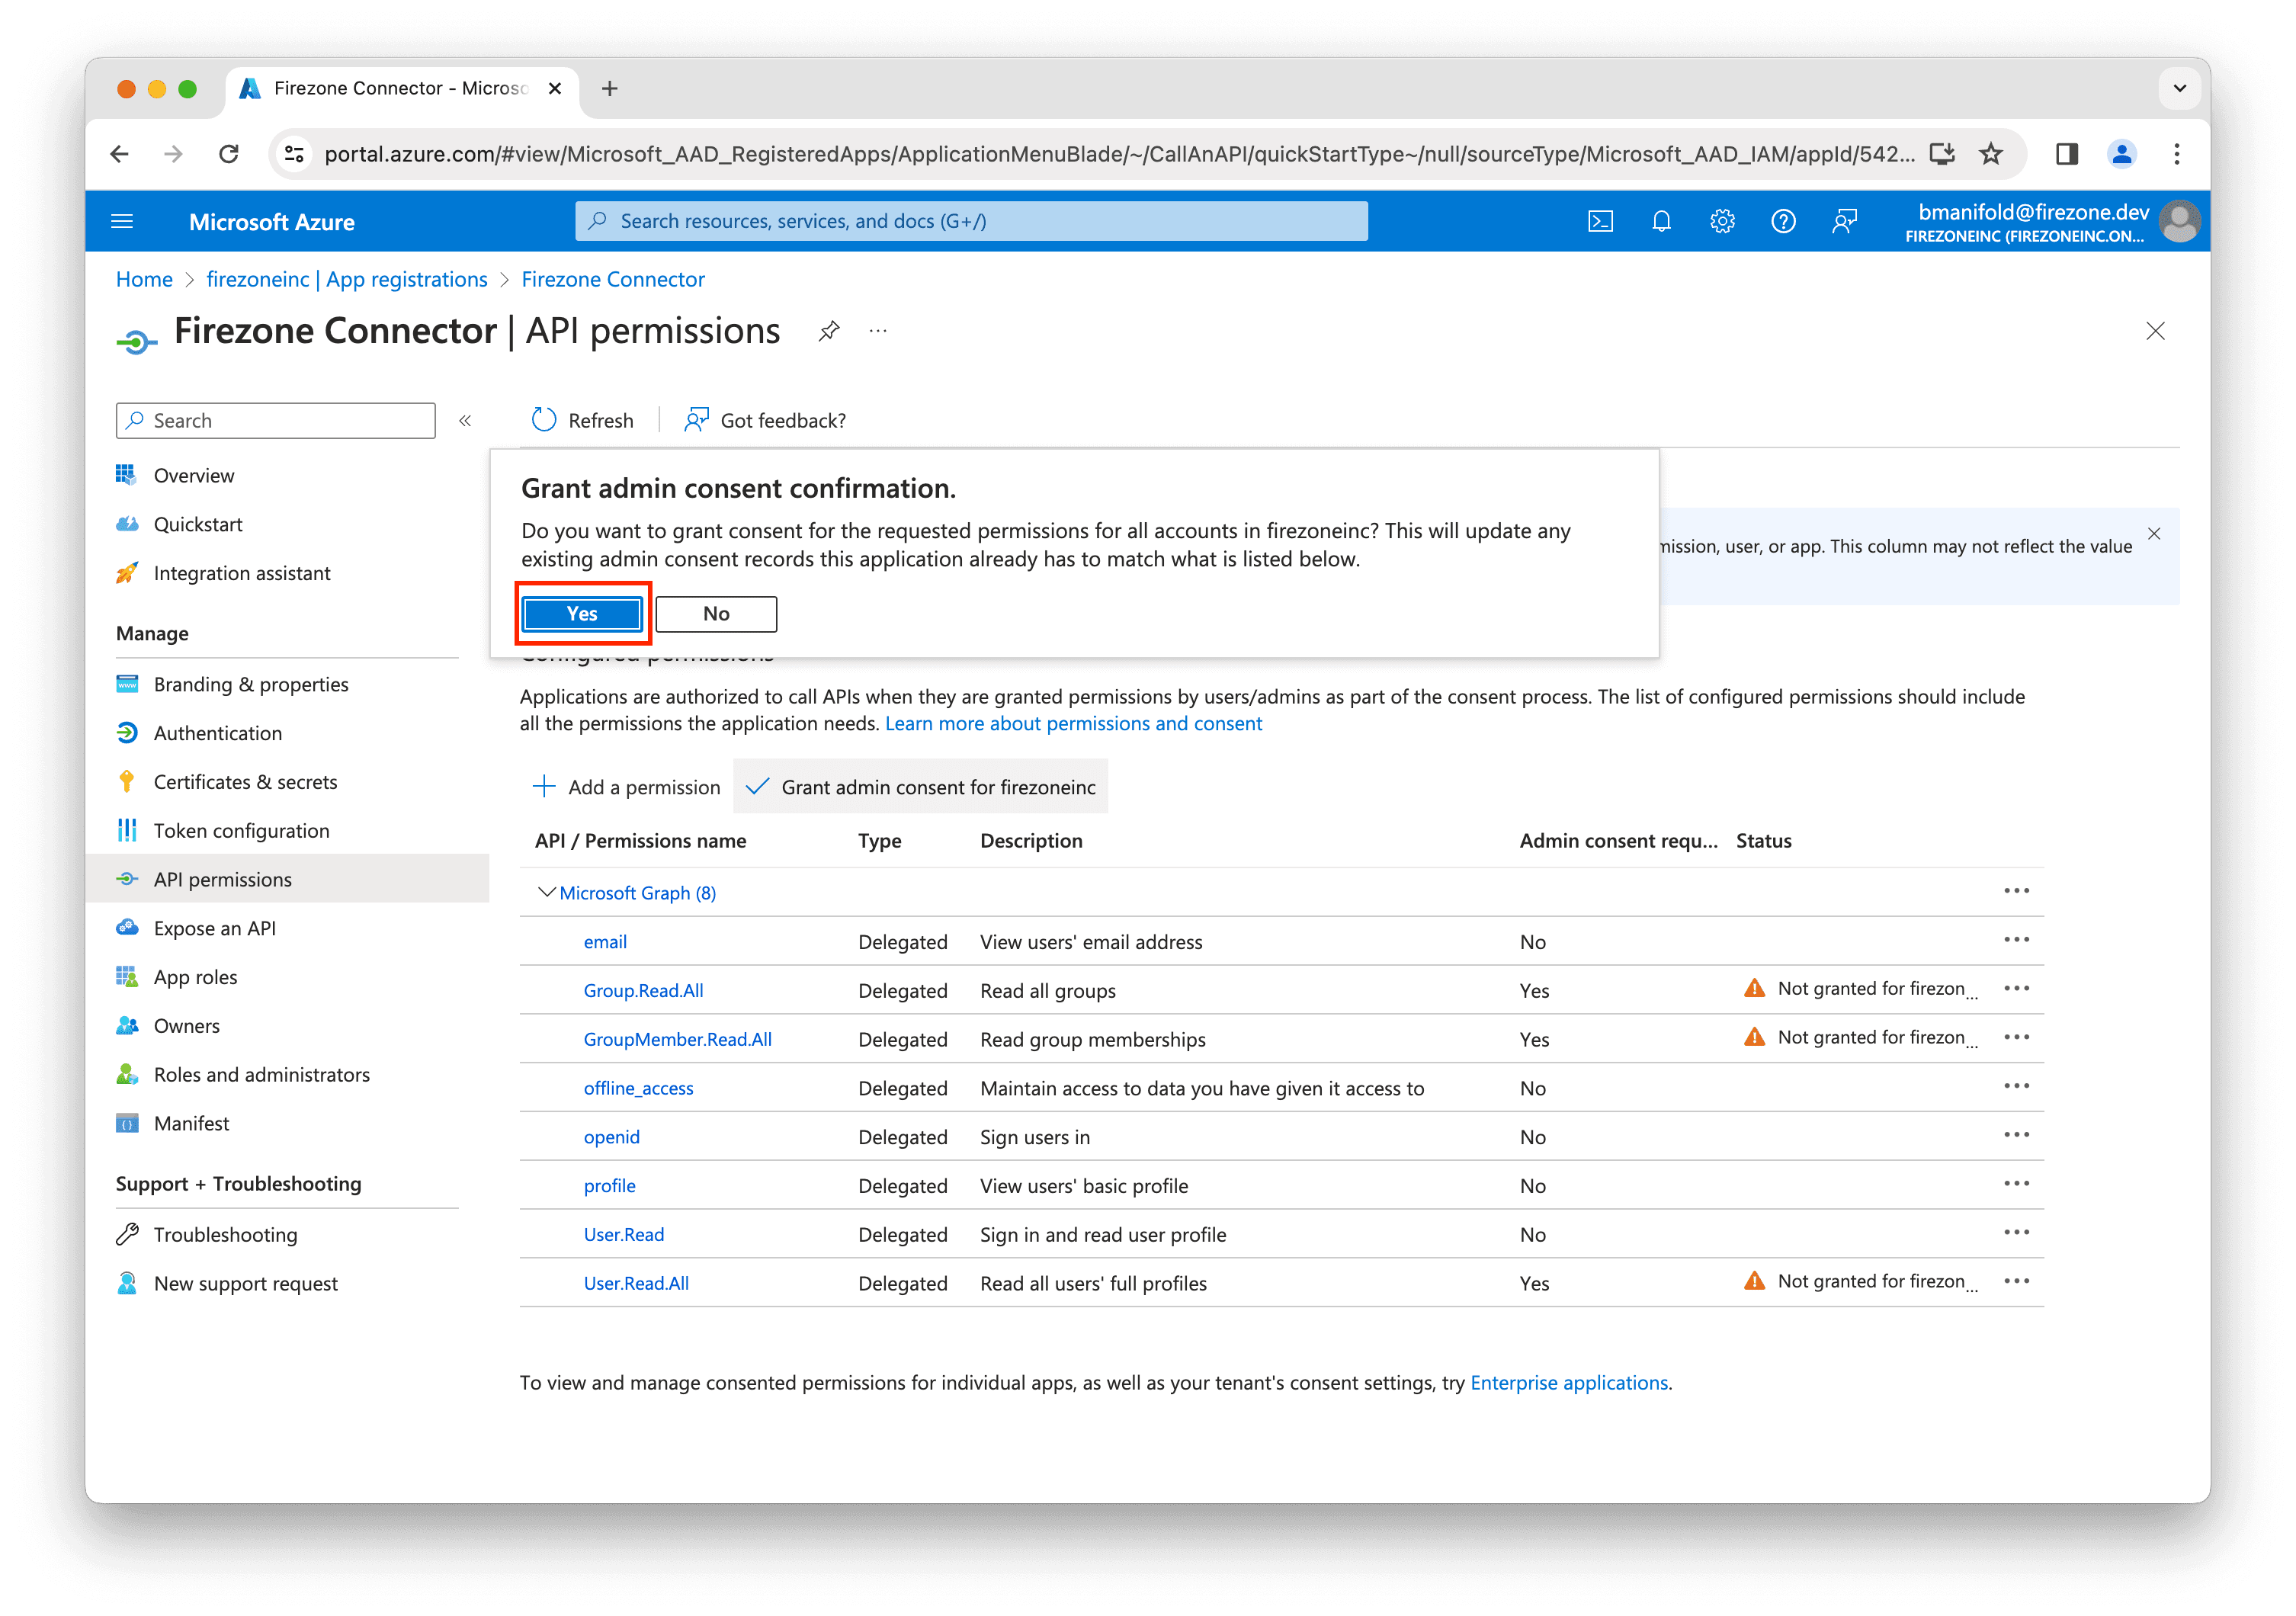
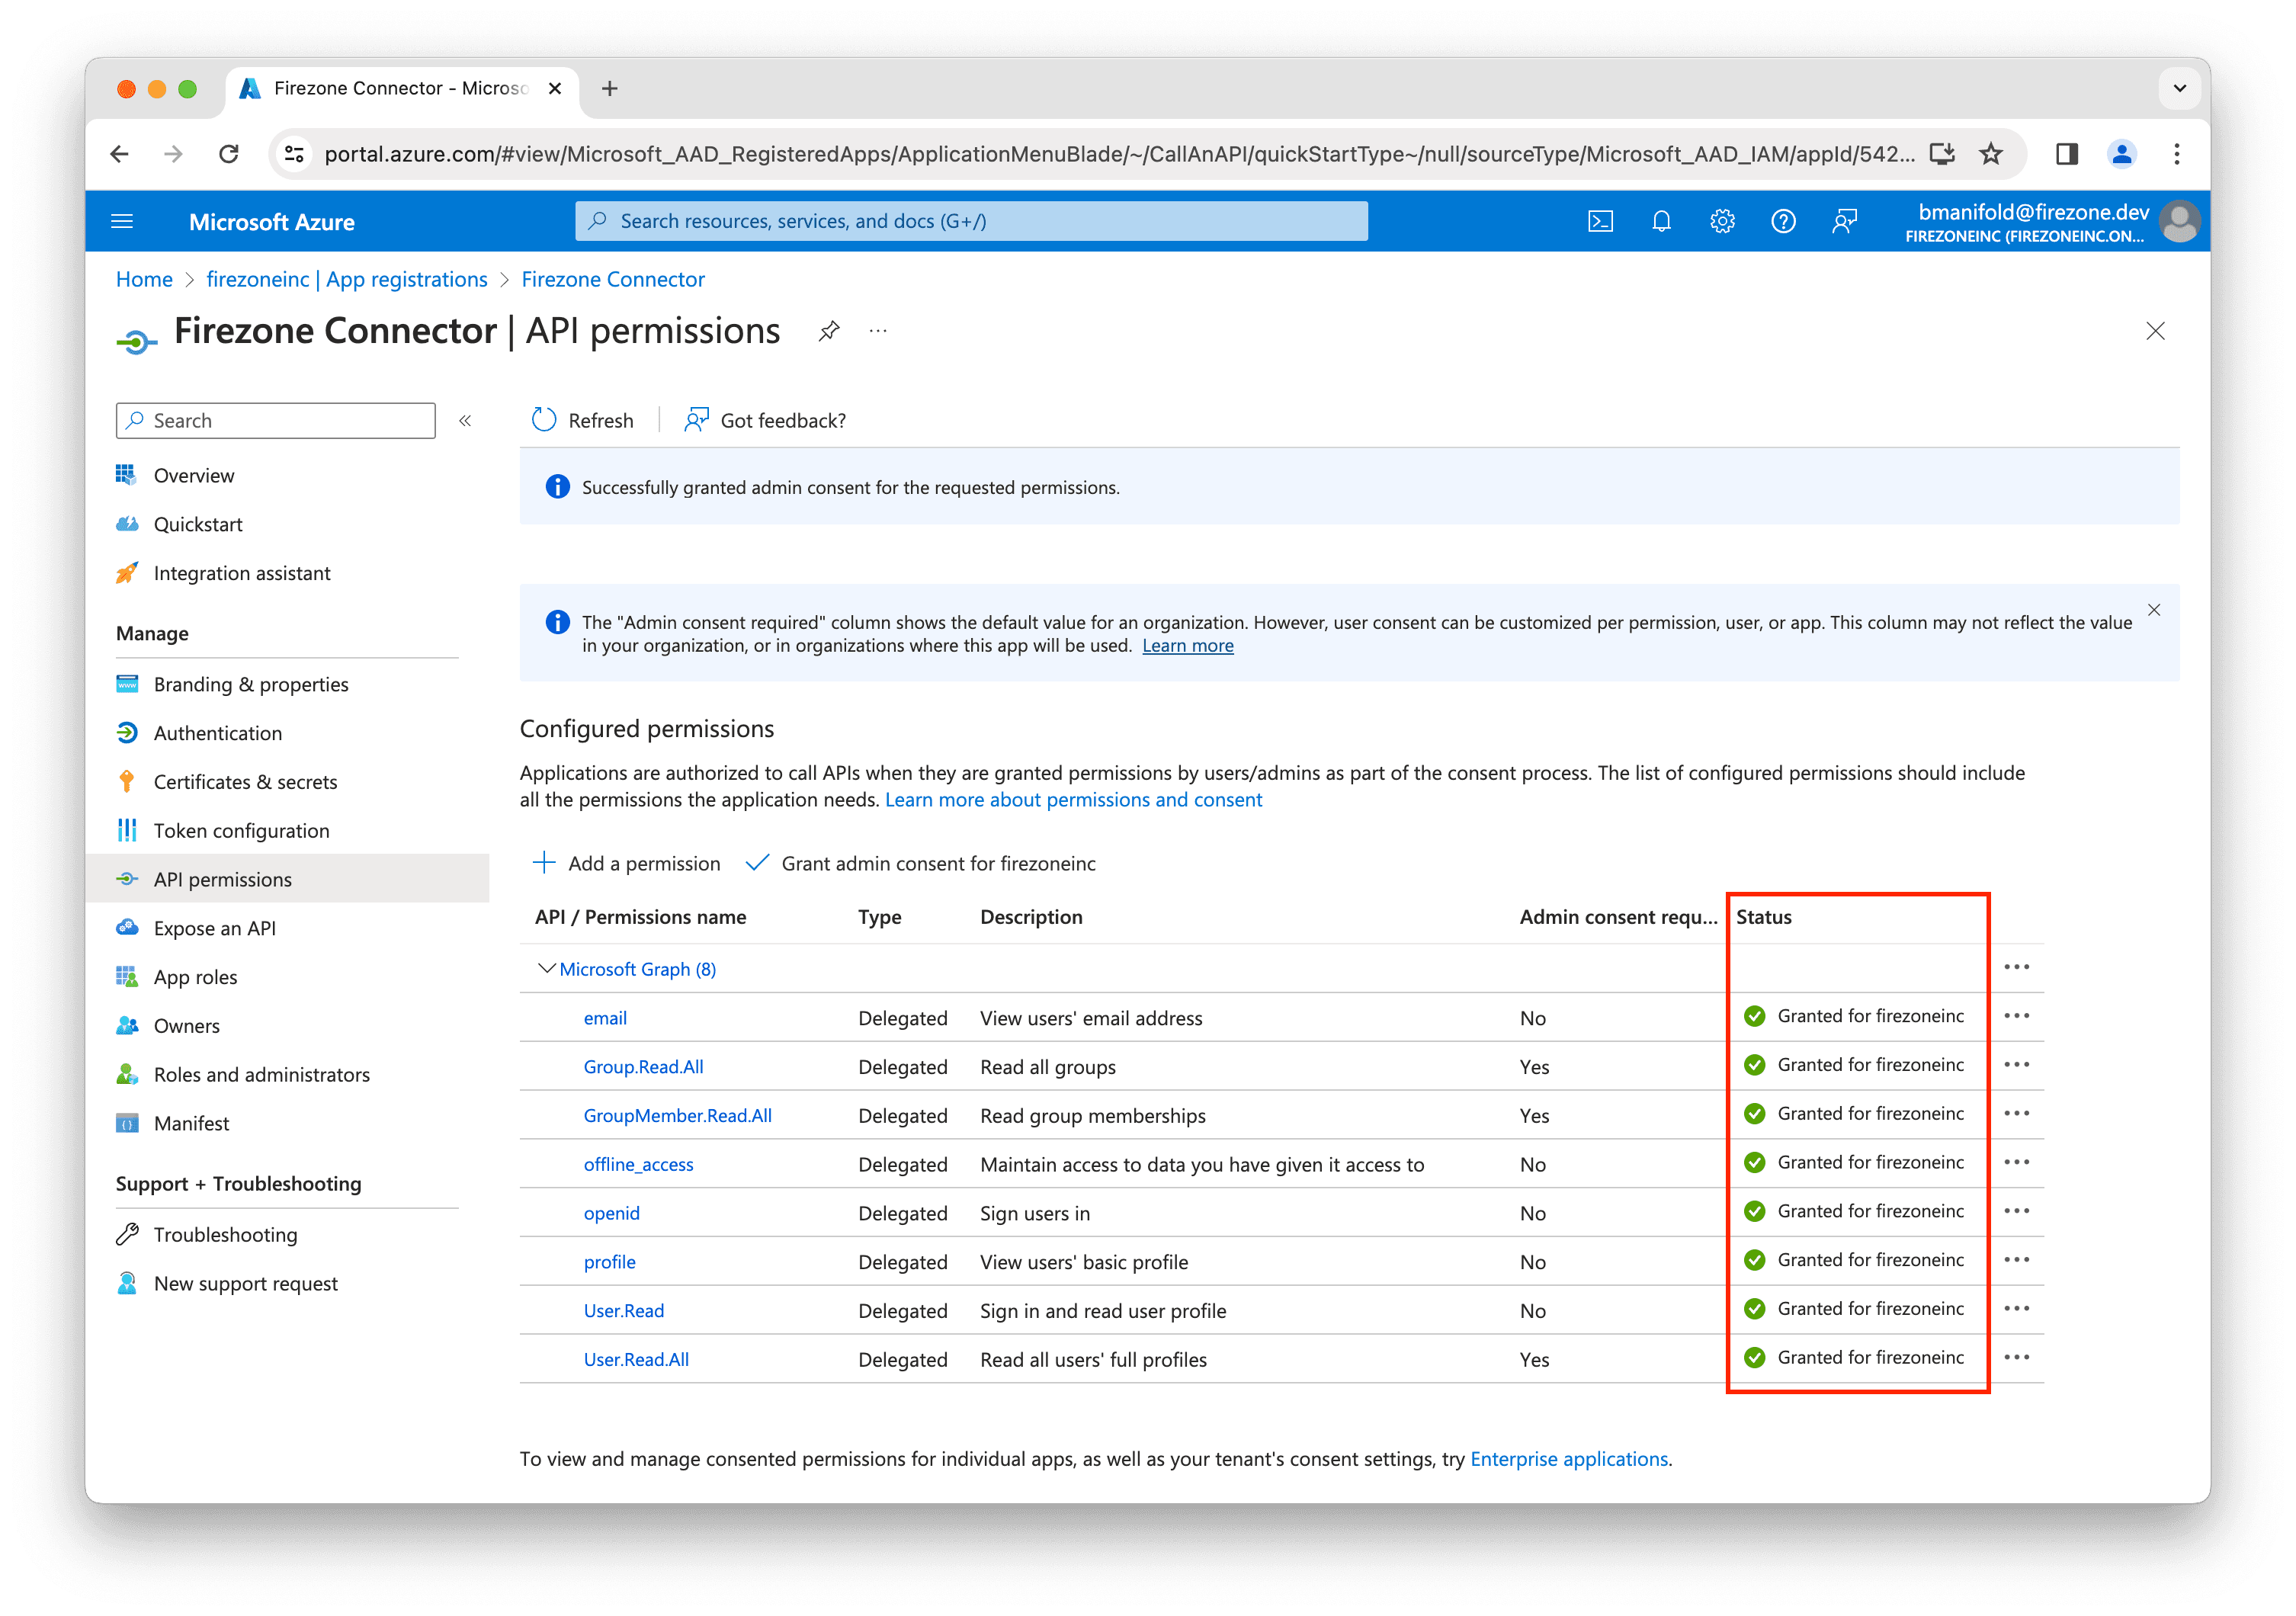
Verify that all of the scopes have the status Granted for
[your organization name].
Step 5 (optional): Configure branding and info
You can optionally configure branding and info for the Entra ID connector in the Branding & properties section of the app registration.
Use this link to download an appropriate logo to use for the app registration:

Step 6: Get the remaining Entra ID provider details
Finally, you'll need to get the Discovery Document URI and Client ID from
the app registration to enter into the Firezone admin portal.
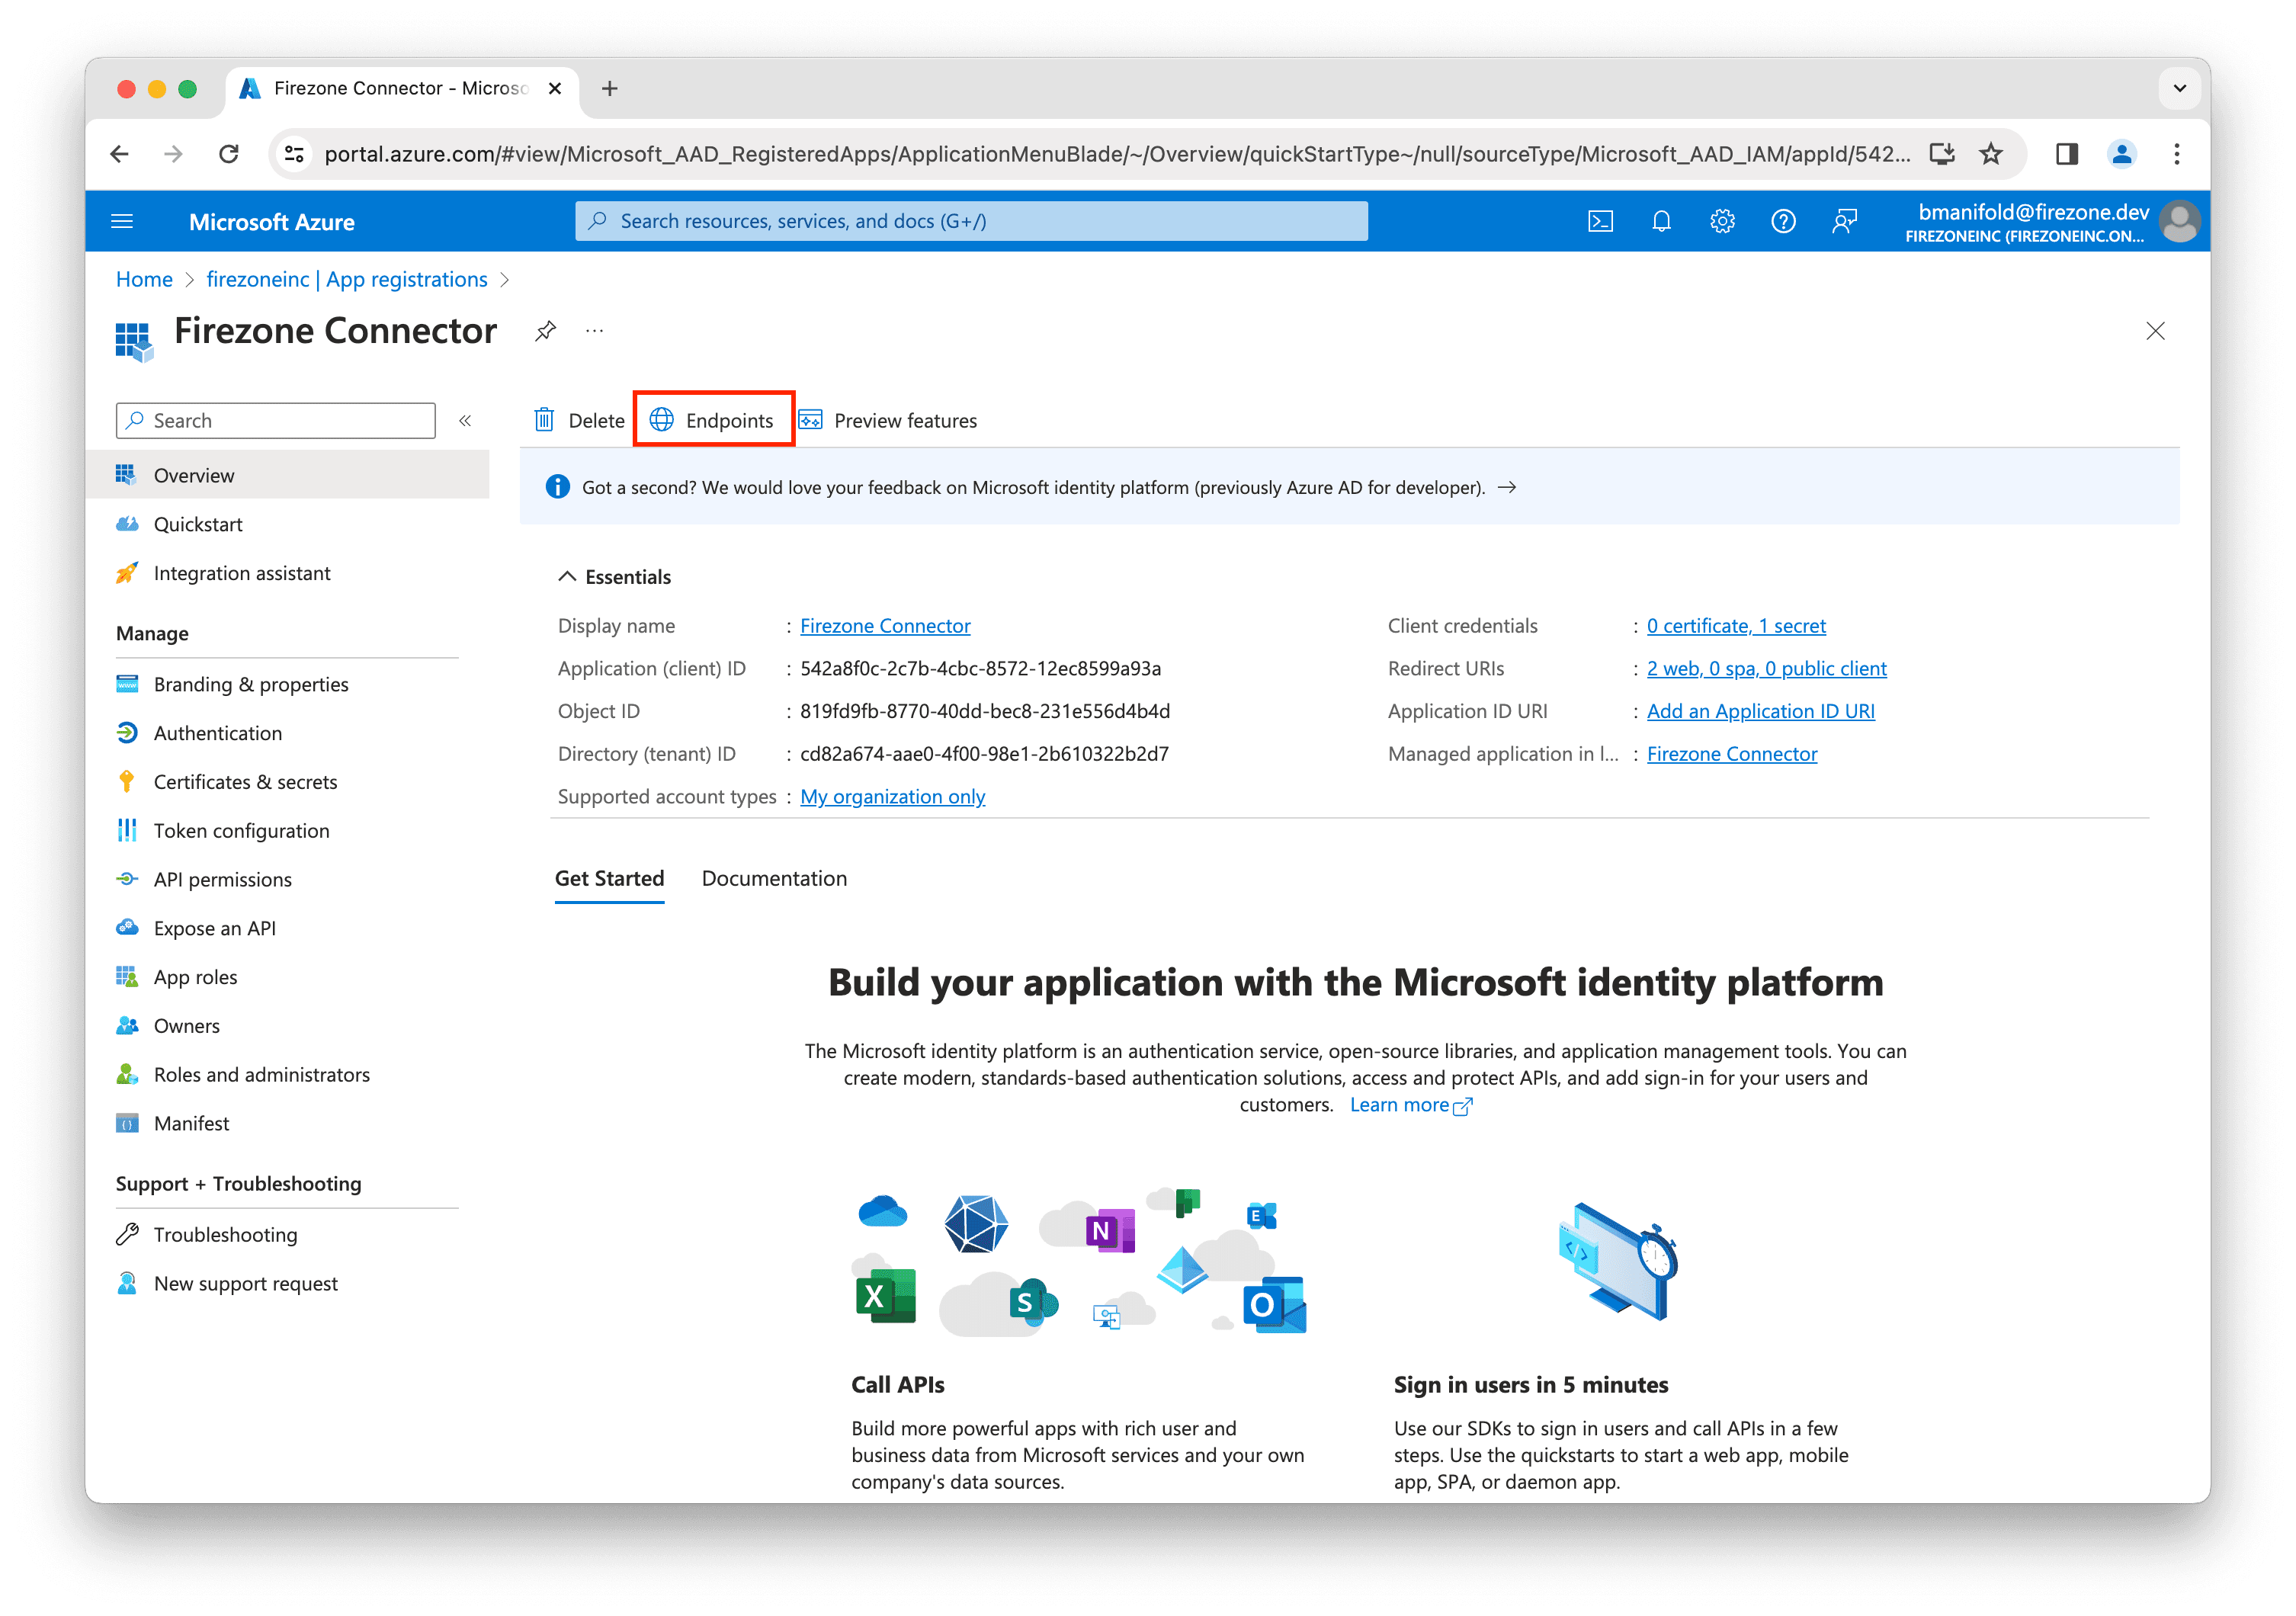
In the Firezone Connector app registration, click the Endpoints tab.
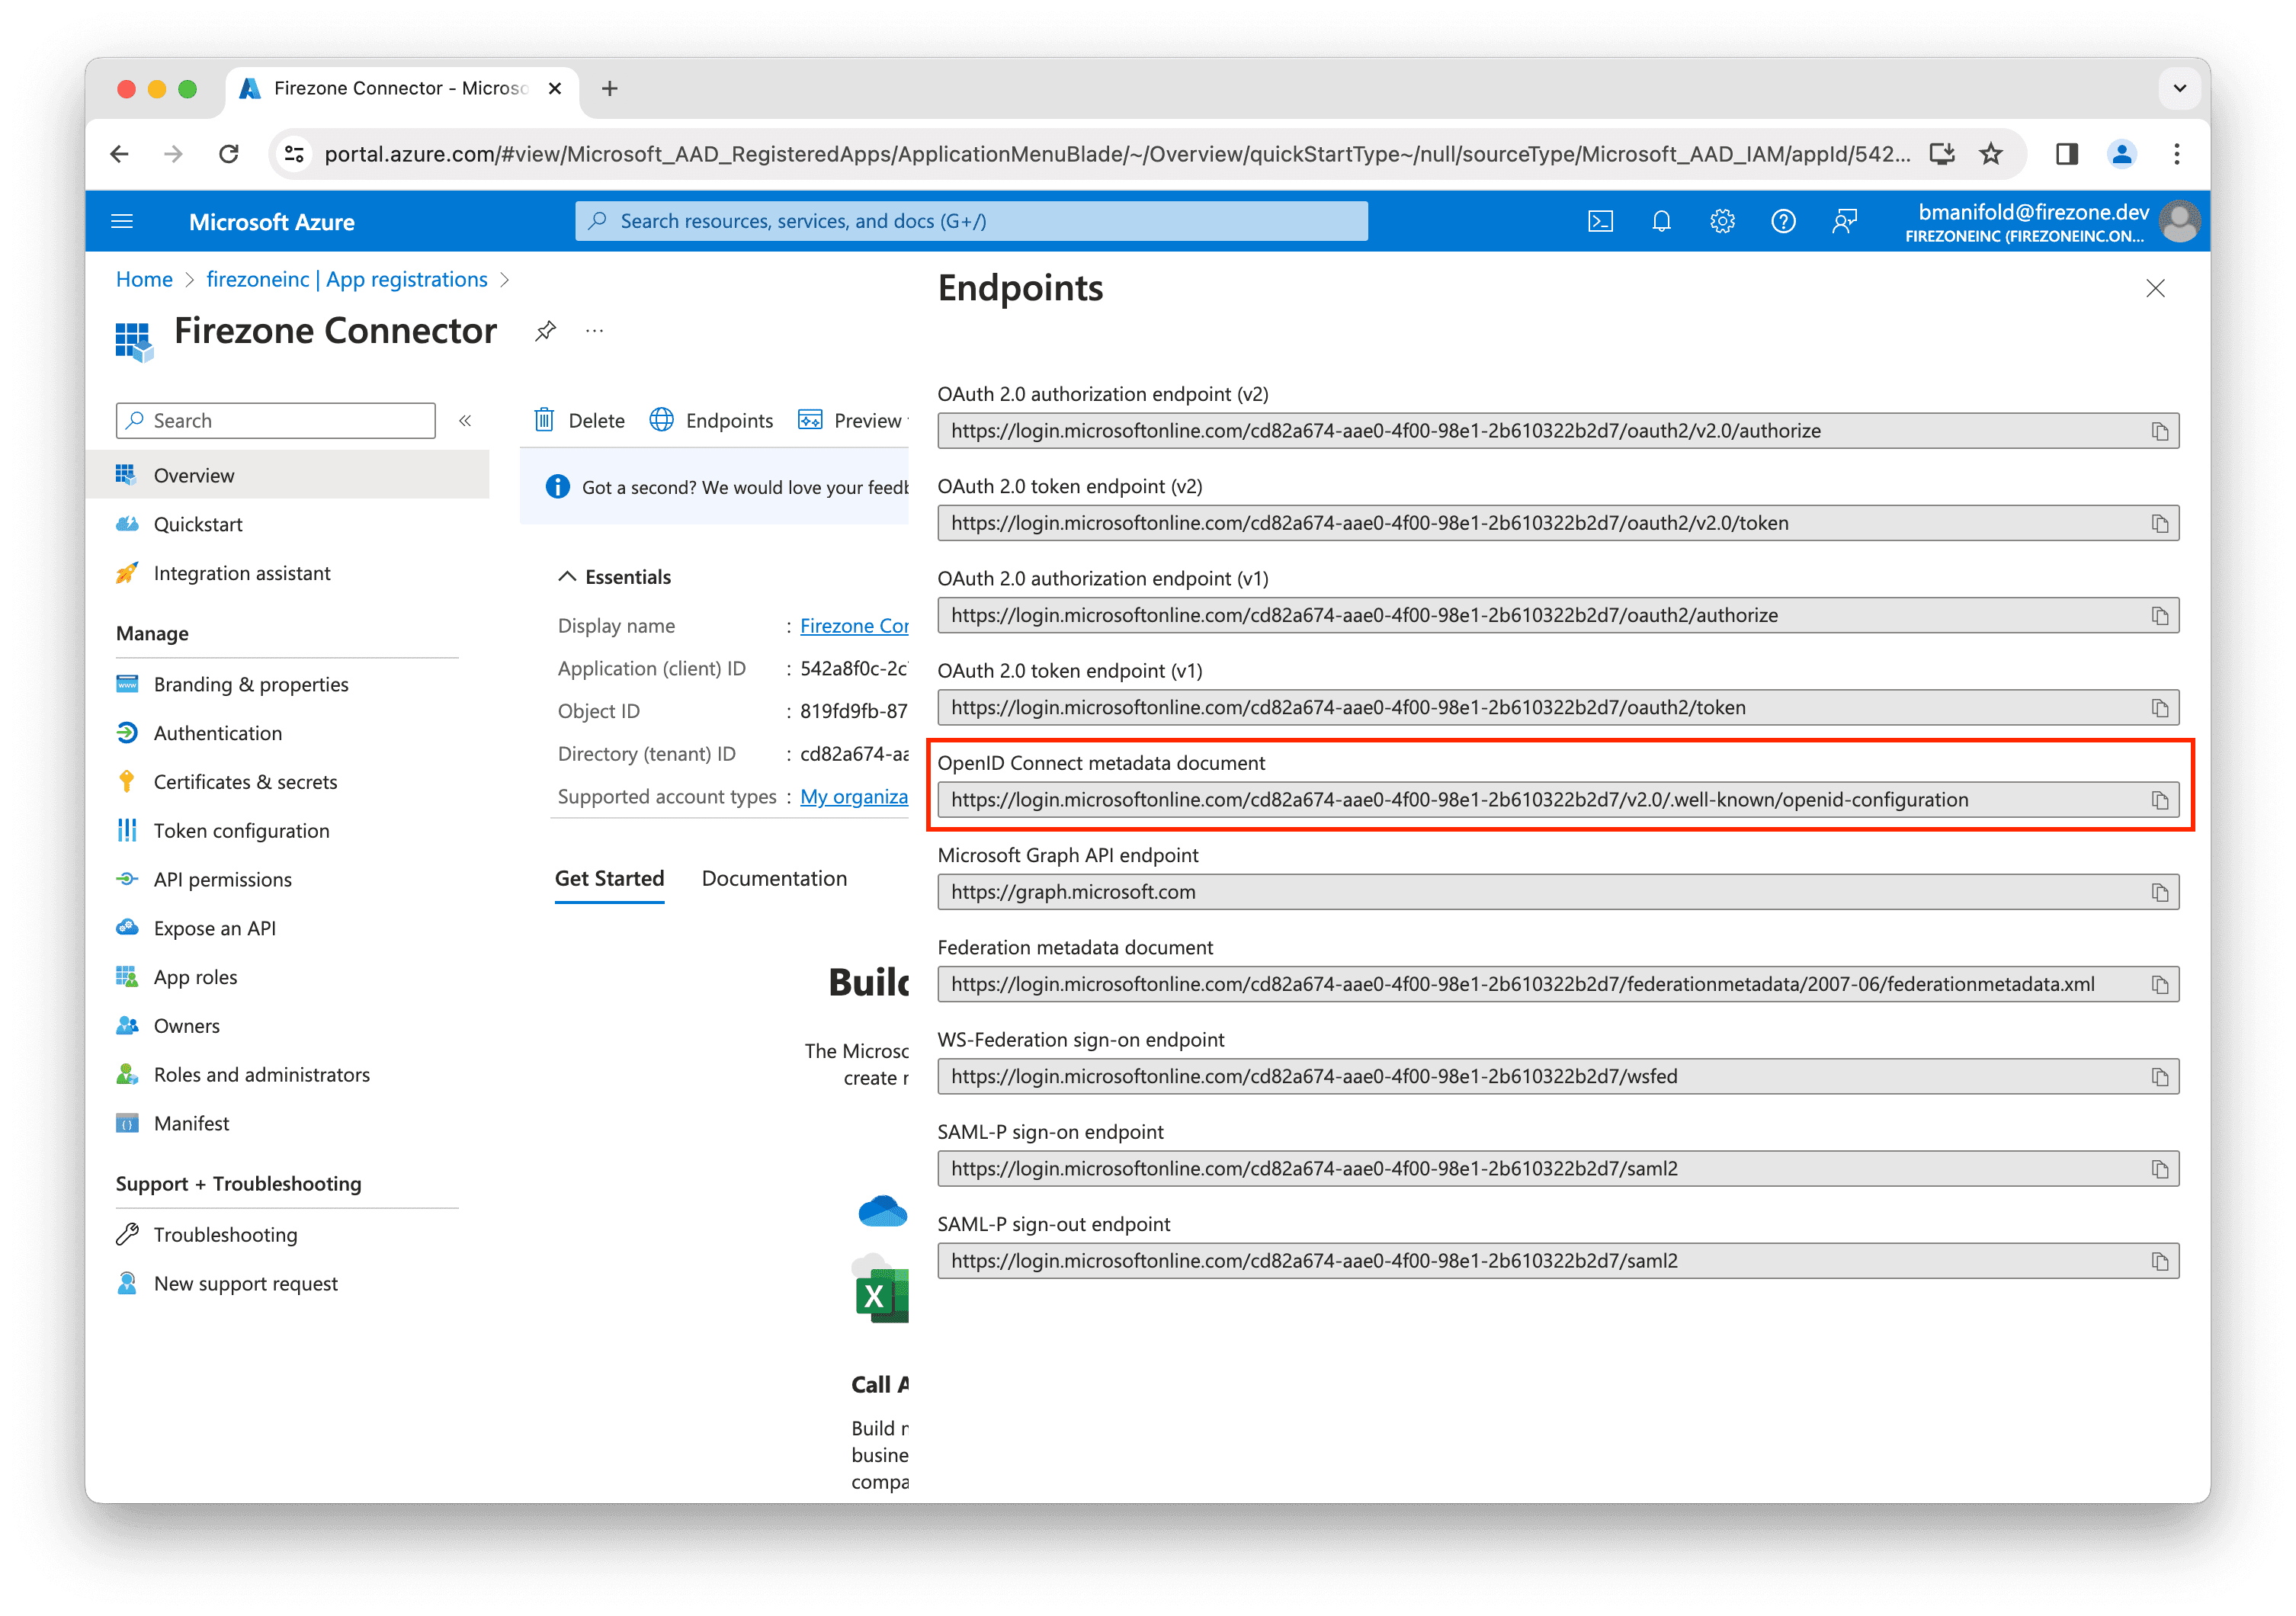
Copy the OpenID Connect metadata document URL and enter this into the
Discovery Document URI field in the setup page in the Firezone admin portal.
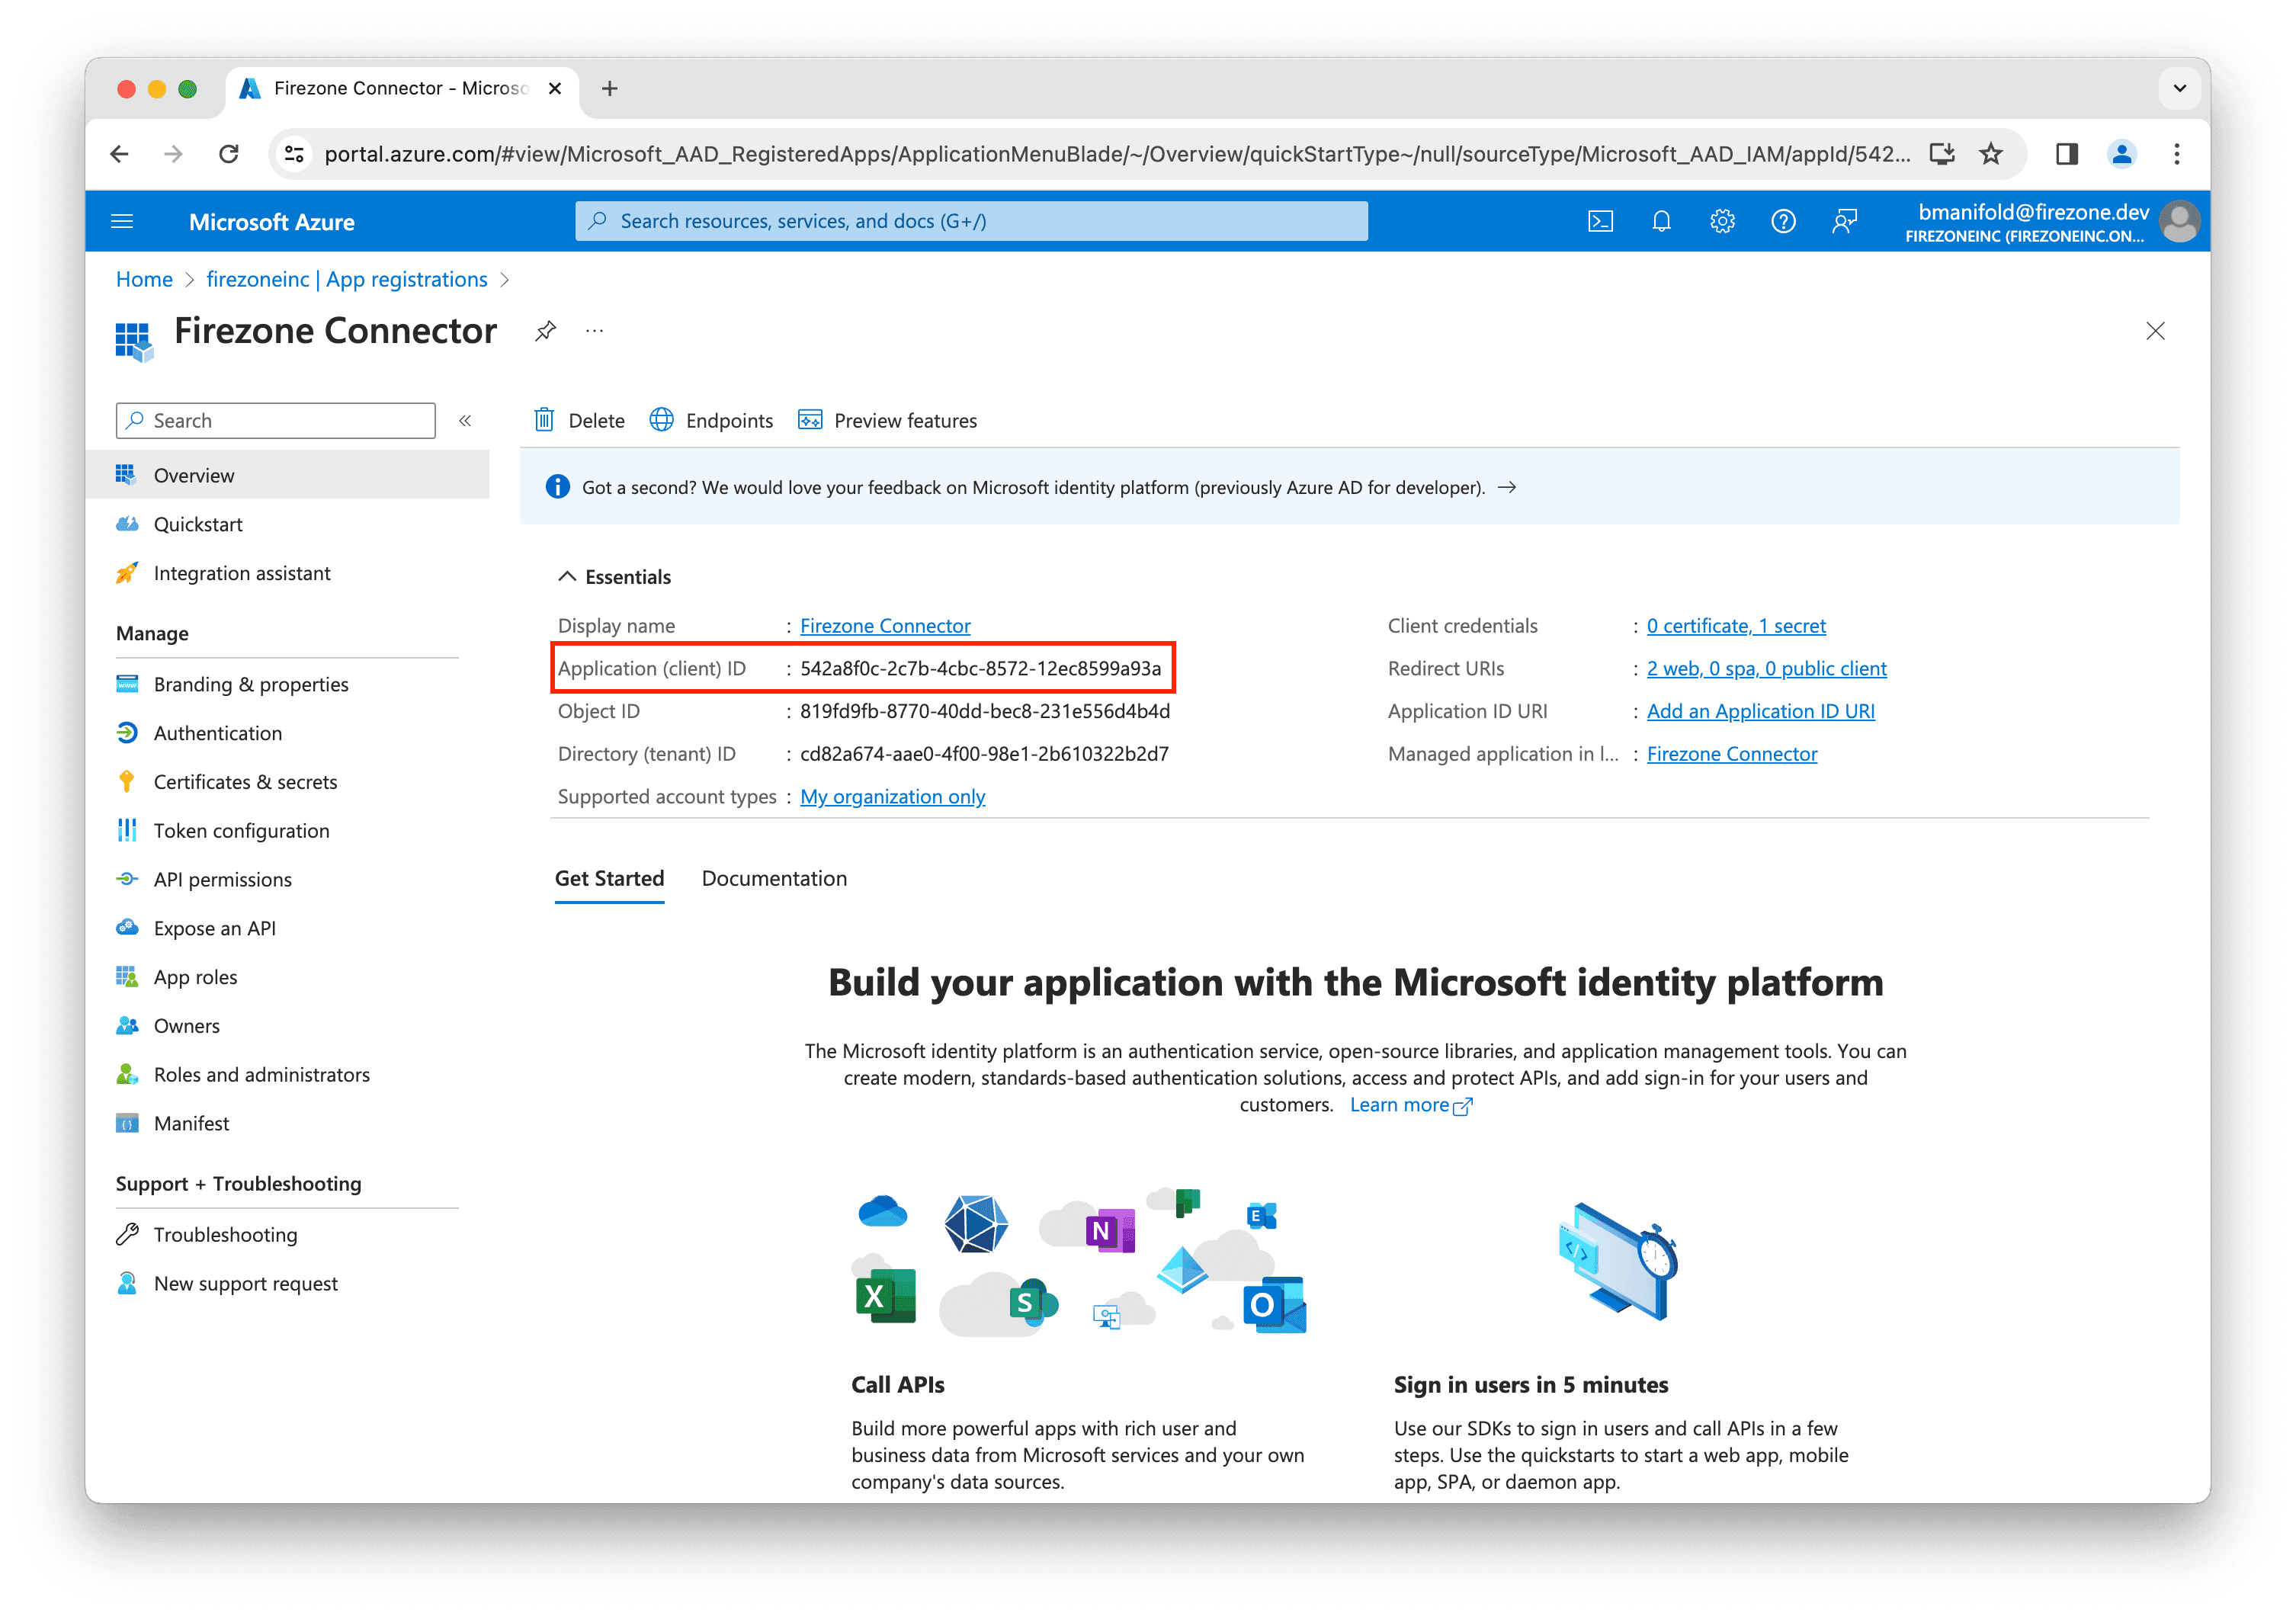
Finally, back on the app registration page, copy the Application (client) ID
value and enter this into the Client ID field in the setup page in the
Firezone admin portal.
Important: Make sure to save the Client ID and Client secret fields in a
safe place as they won't be shown again.
Step 7: Complete the Entra ID provider setup in Firezone
Go back to the setup page in the Firezone admin portal, ensure all fields are filled out, and click Connect Identity Provider.
If you get successfully redirected back to your Firezone admin dashboard, you're done! Your Entra ID provider is now successfully configured. The first sync will occur within about 10 minutes. After that, users will be able to authenticate to Firezone using their Entra ID accounts.